Incredible looking!
Nice looking bark too!
Congrats!
-
Two questions please...
How deep is that drip/water pan below?
And...
Is it in the second slot from the bottom?
Thanks!
Incredible looking!
Nice looking bark too!
Congrats!
-
Two questions please...
How deep is that drip/water pan below?
And...
Is it in the second slot from the bottom?
Thanks!
Appreciate the nice words.
It's in the third slot from the bottom (it doesn't seem to fit in the 2nd slot, at least not easily).
Both are great pans that fit perfectly in the KBQ. Learned about the Winco from others who purchased some for their KBQ on here. Love how much you can learn from this thread.
My second cook with my new KBQ went much better. I reverse-seared a tri-tip, and just by putting in a bit more lump and a bit more wood, I got a good coal bed. I had been too conservative with the lump and wood before.
I did the tri tip at 225* average until it was 110* IT with the bottom poppet open and the top poppet 1/8" open, then seared it on the top of the KBQ's firebox using the grate from my 18" Weber kettle. This part didn't go so well. I made such a roaring hot fire in an attempt to keep a good coal bed that I could hardly sear the tri tip without scorching it. The exterior of the meat was literally popping and crackling. I couldn't get it to be over the fire long enough to raise the IT, and then decided to put it in our already-hot oven, uncovered, to finish the interior. This dried it out and I ended up overcooking it. Also, for such a short cook (about an hour), next time I will leave both poppets open to give it more smoke flavor.
How do you all sear meat on the KBQ's firebox without scorching it? Did I make my fire too large? Or maybe I can run the exhaust fan when searing so that I pull some of the heat away? Thanks for any ideas!
So far all I have done is pull the rack out of the KBQ and place it on top of the firebox. I used to tongs to flip it, but I'm thinking of trying using a second KBQ grate to 'sandwich' the meat and then flip.
Did my burn in today. I sure it was not necessary but I had to play with it a little. I did glean some good info about the temperature ranges and the numeric values on the knob. I would have cooked but there was not enough time for that in my day. In case anyone is interested my invoice number was 1894.
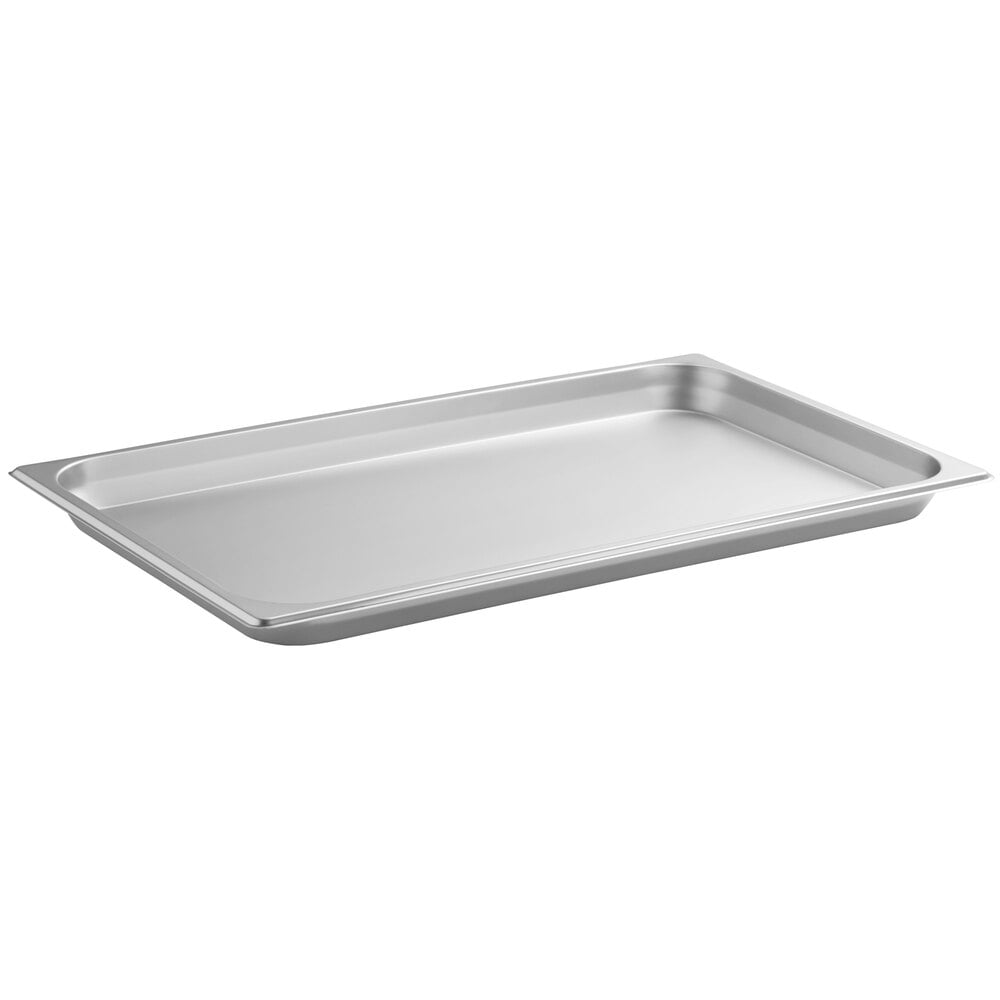
Also, I thought someone might be interested in these:
Serve appetizers, wontons, and fresh-baked fish in a quick, convenient fashion, with this Choice full size standard weight stainless steel steam table / hotel pan. This shallow pan is designed with double reinforced corners that add strength where the pan takes the most abuse. It's built from sturdy, yet economical, 24 gauge, 18/8 stainless steel that easily goes from freezer to oven to serving line without bending. Steam vegetables with ease! Even under tough conditions, this pan will sit flat in steam table wells and hold its shape. This full size steam table pan is also great for serving baked goods and sandwiches in a cold table at your catering event or buffet. The impact-resistant design makes cleaning and refilling a breeze. Overall Dimensions: Length: 20 3/4" Width: 12 3/4" Depth: 1 1/4"
Before I even used mine I bought that pan and the handles BBQ_Bill sells. I use the tool that came with the KBQ to lift the lid and have had no worries with sticking or getting it back on.
Histrix, the lid for me forces the heat and smoke above the fire to go down thru the coals.
This large amount of heat and smoke increases the bark and decreases the time to get it.
After I discovered this, I don't smoke without it.
BBQ Bill The amount of heat inside the cook chamber is controlled by the thermostat. Putting the lid on doesn't mean that MORE heat goes into the cook chamber. I can see that using the lid may lessen the amount of fuel consumed but I'm not concerned about that.
Yes, the "dirty" smoke from the top poppet will darken the bark faster.
I think what I am trying to say is the lid forces much of the smoke that would escape, down through the coals. This refined smoke is cleaner and tastes better.
It's all good.
My fellow KBQ owners...
I purchased my first KBQ late in 2016.
This first KBQs lid got stuck so bad that I gave up on this lid after several hours of "fighting" with it.
I had to literally PRY it off each time that I needed to add wood!
As I added the wood, the lid sat there cooling on the concrete, and it would shrink slightly.
After adding the wood, I replaced the lid with a slight struggle because after cooling a bit, it was actually a touch smaller.
So basically, it had cooled, shrunk a bit, and fit.
Granted, it was a bit tight but it fit again.
However, as it heated it grew and became seriously stuck once more.
Frustrated, I sat the lid aside as "unimportant".
-
Curiously, per my notes I realized that there was a change in the smokes after this first one.
The great bark had gone away!
-
Months later I was still trying to figure out why my very first smoke which was two briskets had such GREAT bark.
I studied all of my notes and suddenly realized that the ONLY change that was made was that I quit using the LID!
I want to let you all know that I'd sat the lid aside as a "not needed and useless" hunk of metal!
-
I told Bill Karau about my sticky lid problem.
He then decided to make the newer lid blanks smaller by 1 mm.
-
So my smoking friends...
The older KBQ lids DO get stuck, but this modification on this older lid (My 1st KBQ) not only works...
It will only cost your time.
-
Simply, use a large hammer and bend the edges of the lid.
Start by bending the long edges in by using a hammer.
And...
Then bend the short edges out with your hammer.
-
After over 100 briskets, I can tell you most assuredly that you will have NO MORE stuck lid PLUS I want you to trust me in that you will get SUPER bark MUCH faster!
Cookers:
Stump's Baby
MGrills M1 SS
Weber Spirit propane
Vintage PK Grill
Gozney Roccbox propane/wood pizza oven
Frontgate portable infrared grill
Propane Lobster/Corn cooker
Magma Marine Kettle 2 Grill and Stove Party Size (boat)
Kenyon City Grill (boat)
Gadgets:
Looftlighter (original and wireless)
Weber charcoal chimney
Chimney of Insanity
BBQ Dragon
BBQ Guru Party Q
Flame Boss 500
iGrill2 and iGrill mini
Backlit Thermapen
Infrared Thermometer
Stainless smokebox for gas grill
sawdust "maze" for cold smoking
I have never in all my life heard men talk more about cleaning that didn't involve a car...
That being said, I cleaned the control box yesterday. One of the fans has a bit of corrosion on it. Nothing serious, just a bit bumpy in a circle about two inches around the center point. Is anybody else having that issue?
That is pretty normal. Mine also have, slight corrosion on them. If it gets to bad I am sure Bill would help you out. Maybe post a picture so we know it is nothing out of the ordinary.
I am planning my first cook, a pork butt/shoulder. I am considering cutting an approximately 5 lb. cut in half to reduced the cook time and increase the bark. Thoughts? Ernest? Meathead forecasts the cook time for a 5 lb butt at 8-12 hrs @ 225-250 degrees f. I am sure it will be quicker in the KBQ. I will most likely serve them as street tacos, shredded.
Hey Dan, I just smoked two packers for a party this last Saturday.
The larger one was an 18.2 pounder before I trimmed it up a bit.
I like to go right at 9-1/2 hours in the smoke and then pull, spritz heavily and double butcher paper wrap.
(This is EXACTLY what I saw Aaron Franklin do in the 24 hours at Franklin's video by the way, PLUS this was an all Post Oak Smoke )
-
However... THIS time, I went a bit looong (unintentionally) and left them in the smoke for 11 hours at 225°F with the bottom poppet full open only.
Luckily, I did not use over the fire smoke (top poppet) at all on this one as I was figuring there would be too many eaters that needed a "light smoke" introduction to Texas Style brisket.
-
So, I lost track of time and they SERIOUSLY looked like meteorites when I pulled them to wrap.
Could NOT get any blacker.
Wrapping was definitely later than I wanted on these two.
-
When I brought them in to spritz and wrap my smokin' buddy Mike says "Ohhhhh, MAN those look good!"
(He's a "Barkin' Q Fanatic")
THIS is what I'm talkin' about.
The brisket flat that fell from space!
-
If you go that long with the lid on and the bottom poppet only, you should get some SERIOUS bark as well my friend.
The flavor should be "Outta this World!"
You know, the kind of bark that puts the best jerky to shame.
-
BTW, the flats probed tender not much later, so I rested them about two hours at around 110°F ambient and then held them in a VERY moist kitchen oven at 170°F for 5 hours.
I finally pulled them still wrapped into a pre-heated cooler and transported them 70 miles North.
-
Cutting and serving at 8+ hours after they were done turned out well.
I was quite happy that they were not dry, and there were several eaters there that were Thumbs-Up-Amazed.
LOTS of compliments plus coming back for seconds.
(Especially the 1st time eaters of Smoked Beef)
-
Smoke On!
Last edited by BBQ_Bill; July 31, 2017, 11:40 PM.
Reason: Add Photo
I have been smoking like crazy since it arrived. Just this last weekend I smoked 14 briskets and I also worked in a case of big tom turkey drums too. When I first got the KBQ i was smoking 8 briskets every weekend. During this time I have worked up quite a few questions regarding how best to run this beast.
I am going to structure this post around 3 basic topics.
1. General Operation Questions
2. Brisket Question
3. Poultry (chicken and turkey) Questions
1. GENERAL OPERATION
While I do feel that I am getting the hang of running the smoker I have noticed a few things that make me question if I am doing this as well as one could.
a. I need to add fuel every 10-15 minutes basically. I am burning Oak logs and sticks that I bought from some guy who amazingly had already chopped most of them down to the correct size. Some of them I split with an axe but most fit right in. He said he aged most of the load from 12-18 months. The reason I need to add fuel so often is to maintain the coal bed nice and thick. I have noticed that after about 8 hours of cooking I have basically filled the ash basin.
My thoughts are that maybe the wood is too dry and is therefore burning quicker than it should. Would this affect the coaling quality? Either that or I am fluffing the coal bed too often but really i try to leave it until it seems to be "clogging" the inverted flame.
b. So the coal bed needs frequent tending it seems otherwise the flames do not penetrate through the grate and illuminate the KBQ cutout. Am I correct in my understanding that there should be some amount of flames penetrating through the grate when the suction fan engages? Coalbed management really seems to be the key to running this machine. Any pointers?
c. My suction fan seems to run quite a bit unless I have a thick coal bed. I am guessing when the coalbed is smaller the heat is not enough to quickly raise the internal temp and it just keeps running for extended periods.
d. I have had the most success keeping the firebox loaded probably halfway to 3/4 of the way full. As I understood from reading the forums before purchasing I could add a log every 30 to 45 minutes and maintain temps. When I add larger logs, aka brick size, I have to also add a few smaller pieces under them so that way the coal bed does not greatly diminish. The larger logs seem to take too long to break down on their own. I do get some amount of side flame when the suction fan turns off which according to the manual means I have too much fuel in the firebox.
e. I am having trouble getting the machine to consistently run much above 275 degrees. I keep adding wood but the temps just don't consistently stay over 275.
Basically I am wondering if other people are experiencing the same issues or if all of these issues may be traced back to the wood being too dry?
2. BRISKET
I smoke the briskets fat side up because I like how the end product looks when I do this. I have tried both ways and I just dont like the presentation of a bunch of grill marks when I am slicing the brisket and I did not notice any difference with product quality.
a. My first question is about the brisket that is on the top rack. I place the brisket with the point side closest to the heat and as BBQ_Bill has said I put them as far back on the grate as I can. What I have noticed is that the top brisket which i place 3 rack levels from the top seems to begin curl up on the flat side. It literally looks like where the convection fan is located a bowl is created in the top brisket. I have begun spritzing at least once per hour and this has lessened the "curl" effect but has not eliminated it. Has anyone else experienced this?
b. I place my target temp at 225ish and the machine seems to run about 200 to 250ish. Is this a normal temperature swing?
c. THE BRISKET IS AMAZING AND THE SMOKE RING IS RIGHTEOUS!
3. POULTRY
After trying some half chickens and tom turkey drums I am questioning whether this machine can actually put out top quality poultry. It definitely tastes decent but the skin is getting kind of rubbery. I much prefer my PBC for chicken as the direct heat seems to create a better product. I have begun using natural hardwood lump charcoal and I throw in a couple oak logs and get them really blazing. I keep the air inlet fully open so I can get a cleaner burning fire on my PBC. Often I will have to crack the lid so I can keep my temps above 300.
a. Am I wasting my time trying to smoke poultry on this machine? I honestly feel i need to use a real wood coal smoker for chicken. Probably more like what Tootsie uses at Snow's.
On a side note does anyone have experience smoking whole chuck roasts? I am thinking a pulled beef / real barbacoa would be a big hit.
Thanks for reading my wall of text. Looking forward to being more active here.
Pull when it has good color, spritz heavily, and double paper wrap.
Continue cooking until the thickest part of the flat is almost there.
It will NOT probe like the point. (Like butter)
When ALMOST "there" pull to rest at 110°F ambient.
LEAVE WRAPPED.
Rest for 1-1/2 hour or so looking for 140°F internal.
If you CAN...
Then hold @ near 100% humidity and 155°F for as long as you need with up to 12 hours not a problem.
John "JR"
Minnesota/ United States of America
******************************************** Grills/Smokers/Fryers Big Green Egg (Large) X3
Blackstone 36" Outdoor Griddle 4-Burner
Burch Barrel V-1 Karubeque C-60 Kamado Joe Jr. (Black) Lodge L410 Hibachi Pit Barrel Cooker Pit Barrel Cooker 2.0
Pit Barrel PBX
R&V Works FF2-R-ST 4-Gallon Fryer *******************************************. Thermometers
FireBoard (Base Package)
Thermoworks ThermaPen (Red)
Thermoworks MK4 (Orange)
********************************* Accessories Big Green Egg Plate Setter
Benzomatic TS800 High Temp Torch X 2 Bayou Classic 44 qt Stainless Stock Pot
Bayou Classic 35K BTU Burner Eggspander Kit X2 Finex Cat Iron Line FireBoard Drive Lots and Lots of Griswold Cast Iron Grill Grates Joule Water Circulator
KBQ Fire Grate Kick Ash Basket (KAB) X4 Lots of Lodge Cast Iron Husky 6 Drawer BBQ Equipment Cabinet Large Vortex Marlin 1894 .44 Magnum Marquette Castings No. 13 (First Run) Smithey No. 12 Smokeware Chimney Cap X 3 Stargazer No.10, 12 ******************************** Fuel FOGO Priemium Lump Charcoal Kingsford Blue and White B&B Charcoal Apple, Cherry & Oak Log splits for the C-60 ************************************************* Cutlery Buck 119 Special
Cuda 7' Fillet Knife Dexter 12" Brisket Sword Global Shun Wusthof ********** Next Major Purchase Lone Star Grillz 24 X 48 Offset
Farmer Jeremy
​​​​​​​1a) I would say you are over filling the firebox. If flames are shooting out side the firebox when the lid is on, your overloading the firebox. Your ash catcher should never fill up, even after multiple cooks. At least mine has never come close. The wood maybe too dry but I don't think that is your problem. I think you are wasting wood. Filing the ash box is a TON of wood.
1b) Your coal bed should be about an inch and a half thick. I make sure the side sight slot is filled with coals. You don't really need to fluff the coal bed. You may not always see a flame coming through and illuminating the KBQ sign out front. Even if there is no bright flame coming through, your still pulling hot air and smoke through the coal bed. Don't be worried bout seeing the KBQ sign illuminated, that is not a great indicator of how your coal bed is preforming.
1c) The thicker your coal bed the more heat you have. The faster it comes up to temp and the shorter the fan cycle.
1d) Run a mixture of logs, that is small and large logs. Avoid chunks, they burn up too quick.
1e) If you can't get the temp up, your coal bed is insufficient. You should be able to hit 400+ with a good, solid coal bed. This is where I KBQ wings and chicken.
2a) I have not experienced this. Maybe BBQ_Bill can chime in on that one.
2b) These are totally normal and not something to worry about. 225 F would be the average here. Just what you want.
2c) You got that right, brother!!
3) The KBQ can dominate chicken. Get a solid bed of coals going, open all the poppets and put the lid on. Then crank the KBQ up to max temp, and keep feeding the fire. I can easily reach 400 F if I have a nice thick coal bed, and the skin crisps up perfectly with that convection fan blasting 400 F air through out the cooking chamber. I love my PBC chicken too, but KBQ chicken is in a league of its own. The KBQ is a stick burner, if you want flavor look no further, you just have to learn how to make it do what you want. Which is easy.
Smoke chuckies like you do brisket. Sometimes they need to be taken to about 208 to become probe tender but they are great for pulled beef.
If I can piggyback on this discussion, how do you all build your coal bed?
- How much lump do you start with?
- Do you use any tinder underneath the lump?
- After how long do you put in wood?
- How long do you then wait for the wood to turn into coals before you add more wood?
- At what point do you start cooking?
I usually try to have a full chimney of lump to start my coal bed. Less (1/2 chimney) will suffice, but i like starting out with a nice coal bed. I either put a sterno can below the chimney, use a wagner heat gun, or map gas torch to get lump started (no lighter fluid ever). I put 1-2 brick sized wood splits on the fire right away after putting coals on to keep it going, i try to fill it to the top but keep lid closed on top. Then I add wood as needed, depending how dry it is it might be 15 minutes up to 30-45 min. I usually put my meat on right away as it comes up to temp fairly quickly.
I dont always get my lump red hot- sometimes i just get it to the point where its red on the corners/outside and the induction fan will get the lump heated up within a couple minutes. In that case, I give it 5-10 minutes to get hot before i put food on since i use cheap lump (royal oak) so want whatever funny stuff to burn off of it before putting with meat)
If I can piggyback on this discussion, how do you all build your coal bed?
- How much lump do you start with?
- Do you use any tinder underneath the lump?
- After how long do you put in wood?
- How long do you then wait for the wood to turn into coals before you add more wood?
- At what point do you start cooking?
Thanks for sharing your techniques!
I start with a chimney full of lump and let that get going for 15 to 20 minutes or so. Then I pour the lump into the firebox and add three to four mini splits and use an electric starter to help get those going even faster. I have the KBQ turned on and at 275 (my ideal temp for pork butts) when I add the mini splits from Fruita Wood.
That seems to be enough to get it to 275. This is when I add the meat. I find I average roughly 3.5 to 4 lbs of hickory per hour. That's typically 2 mini splits, but sometimes 3 per 18 minutes to 20 minutes. I weigh all my wood as I put it on and store my notes in OneNote, so I can come see how a particular cook went. If wait longer than 20 minutes with the mini splits the temp gets down to 260 and will keep dropping every minute after.


")


Comment