


Welcome to our sourdough bread party DanielMelancon ... I hope you dive in and build a starter and then make some sourdough bread. By reading through the thread you will see that it's not nearly as difficult as people have been made to believe it is.
-
-
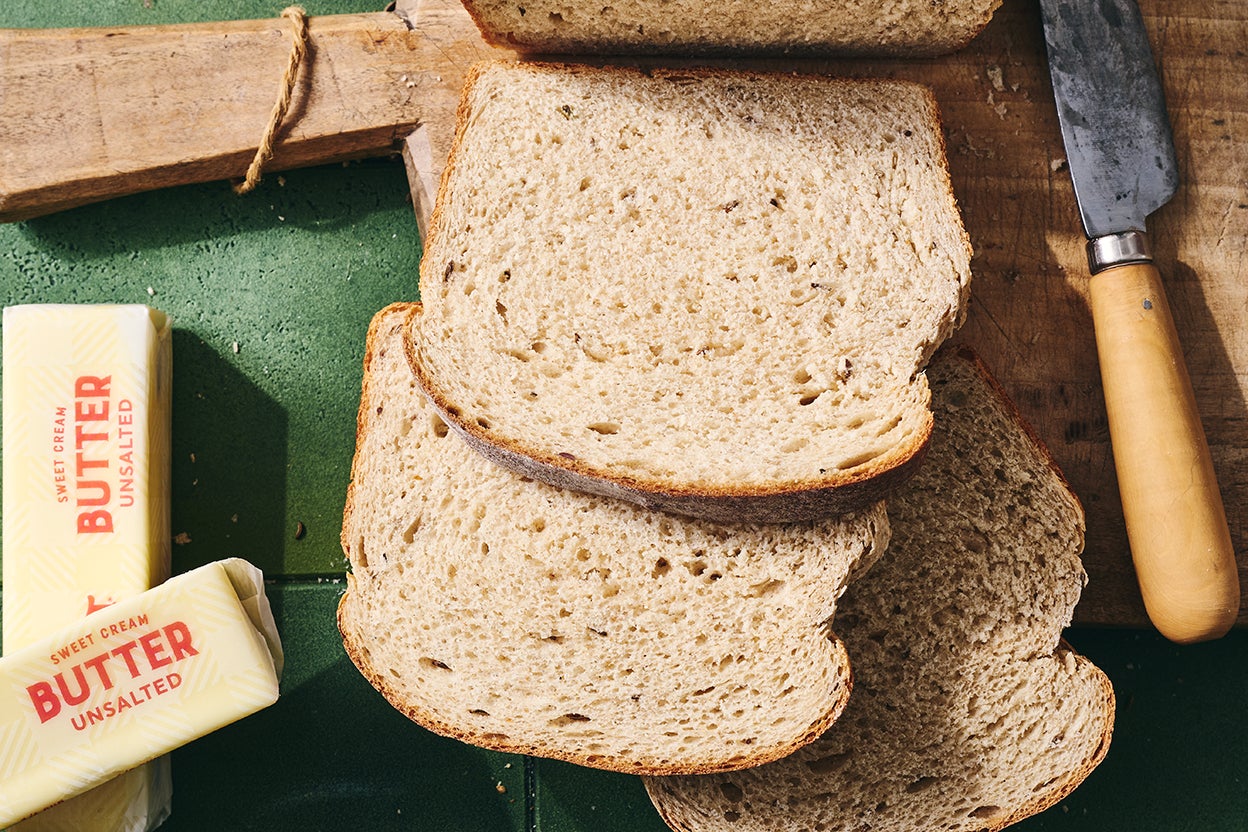
My first loaf made on Saturday. Don't have a DO so I baked is a Japanese clay baking dish with lid, worked great as you can see. Great flavour.Attached FilesComment
-
-
More coming to the bread fold, only good things can happen from learning this craft!Comment
-
Here's another that doesn't suck ...
Comment
-
Comment
-
[QUOTE=Mbmorgan;n209148]Breadhead - guilty as charged! And here's some not so crumby crumb to support your assertion:
Not so crumby crumb... Cause. 1) Not enough tension on your dough during final shaping. 2) Under-proofed. To solve the under-proofing... Refer to the poke test.
Poke your finger into the dough about 3/4 of an inch... If the dent you make springs right back so there is no dent, your dough is under-proofed and needs more time to proof. The gases the yeast is creating inside the dough is what opens the crumb and makes it open and airy.
If the dent stays down and does not spring back at all... Your dough is over proofed. You're likely to get really big holes in your crumb.
if the dent you make springs back half way... It's the perfect time to bake your dough. You will get an open and airy crumb.
You should do the poke test on every loaf of bread. In a room that is 72° you have about a 15 minute window between under proofed and over proofed dough.
The poke test is as critical as final shaping and tension tugs.
Remember... Technique, technique, technique. If you fail on 1 step the end result will stick out like a sore thumb.
The great part is that a tight crumb loaf will still taste very good. I call that toast bread. Slice thin slices and stick them in your toaster. Not having big open holes in your crumb is better for toast.😎Comment
-
So I made my second loaf on Sunday and it came out beautiful (pics later today), but the crumb was odd. Around the edges it was open and airy with some rather large holes (over-proofed?) but the center was denser (under-proofed?), I'm not sure if this is normal. Thoughts?Comment
-
You should use the poke test on every loaf of bread you make.
-
Admittedly I knew it was a bit under-proofed based on the amount of rebound I was getting on the poke test, but I had timing issues and knew under was better than over so I went with it. I was just surprised to see thumb size holes around the edge and toast bread in the middle.
-
[QUOTE=Breadhead;n209162]Actually, the crumb wasn't as tight as the pic would have you believe. It was dark when I took it and in the absence of any natural light, the less-than-sophisticated iPhone flash washed out the center pretty badly. The real problem with this loaf was that it was a sticky mess throughout the entire process. I followed the recipe (exactly ... I double checked everything) from the third post in this thread. Got great gluten structure from the slap-and-fold step. Stretch and fold went well (albeit stickily) ... and bulk fermentation took 3 hours. The real problem manifested itself in a big way during proofing. At this point, the dough was sticky and, for lack of a better word, flabby. It just kept "relaxing" rather than holding more of a rounded ball shape regarless of the number of tension pulls. I liberally floured both the loaf and the proofing cloth in the bowl ... and allowed it to proof until it passed the poke test almost 3 hours later. It was still so sticky that it would grab my powdered finger every time. I then turned the dough back out onto the well floured work surface instead of directly into the DO because the cloth was thoroughly stuck to to loaf. I then reformed the loaf very carefully using (again!) liberal amounts of flour and scored it as best I could given its flabbiness before letting it flop (there's just no other word to describe it) into the DO.Originally posted by Mbmorgan View Post
The good news is that it cooked up pretty nicely and the flavor was exceptional. The overly tart sourdough flavor was very muted this time thanks to a week of daily room-temperature starter feedings.
Like I said in my original post ... the bread didn't suck ... but the struggle to make it sure did!
I'll try the same recipe again next time but if it fights back like this one did, we might be having dumplings instead of bread ...Comment
-
Guest ... One thing I should have commented on earlier. At what you think is the end of your slap and fold process, make sure to do the window pane test. If your dough passes that test it indicates your gluten structure is strong. It shouldn't loosen up after that. -
Breadhead - I did a very sticky window pane test and it looked OK. FWIW, I actually transcribed Chef Jacob's video into a set of detailed notes and a checklist to reduce the likelihood of forgetting steps. (I don't fly airplanes without a checklist and now I don't bake bread without one ).
).
-
MBMorgan ... You are a VERY smart man. Referencing that check list is brilliant while you are learning the craft. Save that list it will be great memorabilia after you master the craft in the near future. Copy that list and give it to your grandkids when you teach then to make bread.
-
-
Today's loaf... I decided I wanted to bake a loaf of bread this morning. The problem was that my starter was past its peak but still active, barely.
I decided i would mix part of the dough with the weak starter and give it time to develop.
The dough I wanted to make was going to be:
600 grams of flour... Part of it from the starter = 100%
200 grams of starter = 50% flour & 50% water
400 grams of water... Part of it from the starter = 66.6% of the weight of the flour.
12 grams of salt = 2% of the weight of the flour.
Early this morning before I took my dog out for his morning exercise, running next to my electric bike, and then our daily stop at my favorite coffee shop, a 2 to 3 hour routine, I mixed up a preferment...
200 grams of water...
200 grams of starter... I stirred the water and starter lightly and then added,
200 grams of bread flour and stirred everything to a shaggy state and covered the bowl with a shower cap.
The intent was to give the weak starter time to regenerate it's self... Kind of like feeding it to make it strong again.
When Da Boz and I got back from our morning routine I mixed the rest of the dough. I added to the preferment:
300 grams of bread flour
100 grams of water
I mixed it to a shaggy state and autolyse/rested it for 30 minutes.
Then I added my 12 grams of salt and mixed it in during the slap and fold process.
Now my dough is complete...
600 grams flour
400 grams water
12 grams salt
Some from the starter some from water, flour & salt.
Once my dough passed the window pane test I put it in my proofing bowl for the bulk fermentation process.
A couple of hours later after it had risen 1.5 times I started the stretch and fold process. I do that every 20 minutes. After 3 stretch and folds if my dough is showing some blisters I final shape it with a couple of tension tugs and then put it in my banneton for final proofing and cover it with a shower cap.
Today... I decided I was going to bake some chicken thighs on my BGE while my dough was final proofing, thinking that will heat up my Ceramic shell of my Kamado. By the time I preheated my BGE to 350° and then baked my marinaded chicken thighs I was thinking I would increase the heat of the BGE to 500° and put in the pizza stone & mixing bowl to preheat it while I had lunch.
After my BGE & pizza stone and Stainless Steel mixing bowl were preheated to 500° I did the poke test on my dough... It was time to bake my boule!
I removed the dough from the banneton, placed it on my silicone baking sheet, scored it, sprayed it with water and put it on the pizza stone, covered it with the mixing bowl and closed the dome.
While my bread was baking under the mixing bowl (20 minutes) I had lunch.👍
After 20 minutes under the mixing bowl I opened the dome, removed the mixing bowl and decreased the cooking temperature to 450° and closed the dome. I let it bake for 10 minutes and then opened the dome and rotated the loaf 180°. 10 minutes later I had the color on the crust I wanted so I removed the loaf and put it on my cooling rack.
All went well...👍
The marinade for the bone-in chicken thighs... http://allrecipes.com/recipe/221901/...an-pork-chops/
Also a basting sauce while the thighs are cooking.👍
Rice cooked in home made chicken stock instead of water...👌Attached FilesLast edited by Breadhead; August 15, 2016, 11:34 PM.Comment
-
-
Today I made a loaf of bread for a friend that asked me if I would bake him a loaf for a dinner he was going to cook on his grill for his mother and father in law.
The recipe...
600 grams of flour
400 grams of water
12 grams of salt
200 grams of it was from my sourdough starter that's 50% flour & 50% water.
I'm giving it away intact so I can't show you the crumb picture but all came out nicely. The BGE is a bread cooking machine.👍
Attached FilesLast edited by Breadhead; August 21, 2016, 08:11 AM.Comment
-
-
I think something went wrong. After three days of the feeding listed above, it was springy and doubling in volume. On day four, instructions were to discard all but 200g of the starter (I think it was about 1770g at the time), then feed with 500g of WW flour and 500 g of 90* water, mix by hand and cover and rest in a warm spot. It didn't really grow after that, but I did the day 5 protocol of discarding down to 150g and feeding 400g white flour, 100g WW flour, 400g of 85* water, mix by hand until incorporated and cover.
Now one it looks like this and won't float.Comment
-
jgjeske1 commented
August 18th, 2016, 09:08 PM
Breadhead, I know bread artistry when I see it. You have those blisters in the crust, so I know you got steam. I just have to admire great work when I see it! 😎
Thank you for your kind comment.👍
Creating a beautiful loaf of bread happens only when your knowledge and execution of the process come together at the same time. If you forget one simple step or you don't handle the dough properly at the right time... You will get a good loaf but not a prefect loaf. This loaf was a good loaf, not perfect. It didn't rise enough to call it perfect. Bad final shaping, not enough tension on the dough. It's little things like that, that keeps me searching for the illustrious perfect loaf.😎 I get them now and then but I can almost always find a SLIGHT flaw in my loaves that most people won't notice.Comment
-
chudzikb ... Yes, your ability to finess the dough properly is directly related to the number of loaves you've made.👍 As I stated early in this thread. The 3 most important parts of making bread is 1) technique 2) technique and 3) technique!!! The more you work the dough the better you get.👍
-
Ray commented
August 20th, 2016, 08:22 PM
Absolutely awesome pics (and results!) Breadhead. Can you explain your recipe including how you account for the weight of the starter? I'm just a newbie at bread making and have a starter underway now in it's 3rd day.
Thank you Ray ... That's a really good question and I'm glad you asked it.
"The recipe...
600 grams of flour
400 grams of water
12 grams of salt
200 grams of it was from my sourdough starter that's 50% flour & 50% water."
For a beginning bread baker that recipe and comment can be vague and confusing. For experienced bread baker's that is just how they talk to each other.
If I was talking to Chef Jacob about this loaf and he asked what my recipe was... I would say:
600 grams of flour
400 grams of water
12 grams of salt
With that information he can duplicate this loaf of bread easily, many different ways.
If I told him that I used 200 grams of my starter in the recipe he would immediately know that it was a same day loaf of bread. Meaning I mixed it in the morning and baked it that afternoon.
To show you that recipe in beginners baker's talk this is how that recipe would look.
500 grams of bread flour.
200 grams of sourdough starter
300 grams of water
12 grams of salt
Remember my starter is 50% flour & 50% water... So what I did was use 500 grams of flour and added 100 grams of flour from my starter to equal a combined total of 600 grams of flour. Then you also have to compensate for the 100 grams of water that was in the 200 grams of starter so I reduced the water called for by 100 grams. So I ended up with what the recipe called for 600 grams flour & 400 grams of water.
"Same day bread" will not taste as good as delayed fermentation bread that you mixed on day one and developed up until the final shaping process then put it into your banneton, cover it, and put it in your refrigerator overnight to delay the fermentation process, and then bake it on day 2.
When you intentionally slow down the fermentation process, to give the flour lots of time to develop, which greatly improves the flavor of your bread... You use much less of your starter. Starter = yeast... So by using less starter you're intentionally slowing down the development of your dough, to enhance the flavor of your loaf.👍
Lets make the the same recipe using much less of our starter to delay the fermentation process. The recipe would look like this.
590 grams bread flour
20 grams sourdough starter
390 grams water
12 grams salt
It's EXACTLY the same recipe but with only 10% of the sourdough starter used for the same day loaf. We're intentionally slowing the process down considerably with the intention of making real Artisan bread with greatly enhanced flavor. You use exactly the same mixing methods and techniques to make this loaf as you do same day bread, it just takes much longer. Think of this loaf as your low and slow loaf... To borrow a BBQ term.👍
You will NEVER find this bread in a grocery store and rarely find it anywhere. Some really fancy restaurants that bake their own bread on site, like Chef Jacob did, when he was the Executive Chef at his restaurant in Truckee, California will have it. Bread factories WILL NOT slow the fermentation process down that much because they would need acres of refrigeration space.
I hope that clarifies the weight of the starter and how it used Ray ... Bottom line is a baker adjusts the quantity of the starter he uses in a recipe to decide when he wants/needs to bake it.
Last edited by Breadhead; August 21, 2016, 09:26 AM.Comment
-
Ray for more SD recipes, click on "Recipes" at the top of the linked recipe, then scroll down to "Bread" and click on that. Then Scoll down a bit and click on "Sourdough" for many more recipes. You can also convert many of the regular bread recipes at King Arthur to sourdough if you'd like, or bake them as posted. Most have ratings and comments on how good they were.Comment
-
Man this needs a stickyComment


Comment