


Very helpful. I started a few years ago using the 3-2-1 method for baby back ribs, modified to about a 3-4 hr duration. Sensing doneness was the big challenge. Looking for cracking was not reliable for me and many times ribs were overdone. Then discovered the best method every invented and rarely discussed. I call it the EAR method: Eat-A-Rib every now and then to determine doneness. Much more accurate.
-
-
True confession ... I have gotten really leery about cooking pork ribs, even with Troutman's most excellent tutorial. I don't do them often enough to know when they're tender but still juicy. The dogs have gotten far too many dry-as-dust, overly chewy ribs. They love eating my mistakes, but overdone, dry ribs make for some expensive dog treats. The experience has been disheartening.
I know the common wisdom is to not cook ribs based on the meat temp, but a recent Thermoworks blog post recommended exactly that. (I know, I know ... they sell thermometers ... but just cuz they have this bias doesn't mean they're wrong.) I figured I had nothing to lose by trying their way at least once. The really short version of their cook method will sound familiar to anyone who's done pork shoulder or similar cuts --
Set the cooker to about 275F / 135 C. Cook the ribs nekkid to an internal temp of 160F / 70C, wrap in foil or paper, return to the cooker, and finish cooking until they reach 203F / 95C, however long that takes. They then suggested unwrapping and returning the rack to the cooker for about 1/2 hour to dry and set the bark.
I tried this method this past weekend on 2 racks of St Louis cut pork ribs, about 4 lb / 1.8 kg each, but one rack was slightly thinner and longer than the other.
The blog post didn't say too much about where they prefer to locate their temp probes, so I decided to put a temp probe in the center of the meat between a pair of bones in the middle of each rack. I realize the thinness of the meat makes this placement a bit tricky, which is why it's a good idea to use the leave-in probe only as a general guide and use an instant read thermometer (Thermopen) to verify.
Both sets of ribs hit about 160F in about an hour. I checked the temps between other bones at this point. The average temp of the meat on the thinner rack was somewhat warmer -- around 160F in the middle to 175F near the ends. The meat on the thicker rack varied from 155 to 165F. I pulled them both, but could have left the thicker rack on a bit longer.
I wrapped the thinner rack in foil and the thicker one in pink butcher paper. The foil rack hit 203F after another 1/2 hour. I pulled it and let it rest in a cooler for 1 1/2 hours. At that point, the foil wrapped rack got cut up and served for supper. There was maybe 1/4 cup of juice in the foil. The bone side of the rack was pointing down while the rack was in the cooler, so the meat was in a humid environment but wasn't sitting in liquid.
The paper wrapped rack took another 2 1/4 hours to reach 203F - quite a difference in time! I gave this one a 1 1/2 hour rest in the cooler to treat it similar to the foil wrapped rack. There was no pool of juice in the paper.
I didn't return either rack to the cooker after unwrapping, because neither DH or I care for chewy bark. But next time I might lightly glaze a rack and give it 10 minutes or so over the fire to warm and set the glaze.
Neither rack had a braised texture or flavor. Both were bite-off-the-bone tender. I'd say the paper-wrapped rack was very slightly drier than the other one, but still juicy. I was pleased.Last edited by IowaGirl; May 26, 2021, 09:22 AM.Comment
-
I suggest IowaGirl that you not give your ribs so long a rest. Think about it, if you bring them to 203* wrapped in foil then put them into an insulated environment, they continue to cook. After a while they are overcooked. I've found that letting them rest on the stovetop just tented or in pink paper allows them to cool down. I generally don't rest very long either, it's not like beef where you have to wait on juices to redistribute. -
Troutman -- The rest in the cooler wasn't planned. I had allowed about 3 to 3 1/2 hours for the cook. When the first rack was done in only 1 1/2 hours, we weren't ready to eat. I could have left this rack on the counter to cool until suppertime, but then would have had to re-heat, and that seemed silly. I treated the second rack like the first mainly in the interests of science. To be honest, I don't think the rest period did any harm, but will keep your advice in mind.
Last edited by IowaGirl; May 29, 2021, 06:44 AM.
To be honest, I don't think the rest period did any harm, but will keep your advice in mind.
Last edited by IowaGirl; May 29, 2021, 06:44 AM. -
Interesting and thanks for sharing.
I was home alone this weekend so I experimented with 1 rack of St. Louis cut ribs hanging 3 hrs in the PBC that averaged around 300; when the meat pulled back from the bone about 1/4"-1/2" and temp was just over 200. Cut it in half, sauced, wrapped one in foil and just hung the other. Pulled them both to rest 20 minutes. They were different, but both were great.
The key is to cook with nobody around asking "What time do we eat?"
-
-
IowaGirl
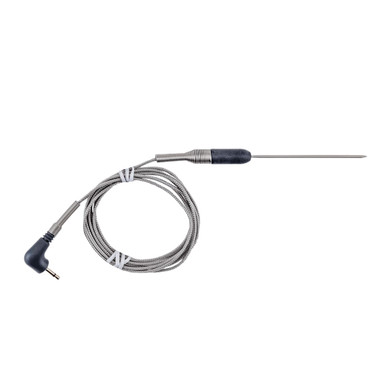
Awww, poor pups. Bones and no meat. If Thermoworks ever sells skinny leave-in probes like Fireboard does, I recommend getting a couple. They easily slip into the rib meat away from the bone because they're nearly darning-needle thin and short, too. I use them every time I cook ribs. Haven't done the bend test in ages. Yay.
KathrynComment
-
fzxdoc Thermoworks now has a High Temp version of the needle probe.
-
A debt of gratitude is in order for taking the time on this. Pleasant work.Comment
-
Welcome johnjohn! We sure hope you're a legitimate Trial member here to hang out and learn. If by chance you are choosing to use our forum as a means to spam us by inserting outside links, please don't do that. If that is your intent, please know that you will be banned. We hope you're here to join our community legitimately!
-
Great write up but I have one question. After dry brining do you rinse or wipe off the salt before adding your rubs?Comment
-
When you dry brine, you don't add any more salt than what would be pleasant to eat. So you don't rinse the meat after dry brining -- and there is no visible salt to wipe off either.
The rule of thumb I use for dry brining (and what is recommended in AR recipes) is about 1/2 tsp kosher salt per pound of meat. Since ribs have a lot of bone in proportion to actual meat, less salt is needed. The rule of thumb I use for ribs is 1/4 tsp kosher salt per pound.
-
Thanks so much for this detailed write up. This is just what the Dr. ordered. I have t. We're o racks of spares from Porter Road. We're cooking for friends this coming weekend. They are fellow Q heads & ribs are their specialty and fave. While I'm not new to the Q game, I'm most def a rib novice.Originally posted by Troutman View Post
I love the idea of layering the seasoning. I would be concerned that dry brining them and using a commercial rub that contains salt might make them too salty. Is this a valid concern?
JDComment
-
Great write up
Usually do not struggle with Ribs but it was nice to read through each of the steps
Getting ready to cook 12 slabs for a fund raiser in May and this was like kickin the dust off or oiling the machine
THANK YOUComment
-
I somehow missed this post. Then I looked at the date, sorta figgered where my mind was at the time. Muchos good writin their Trout. I still call em Wibs!Comment
-
Very well written. I am always open to new ideas and I picked up a few here. Good job!!
Comment
-
Thanks Steve, this is exactly what I was looking for. I've been doing fine on my Traeger with baby backs which the ladies in the family seem to prefer but my son and I like spareribs and my first attempt, done at 225 degrees never got up to that magic 200 degree mark. The men in the family thank you and look forward to following this recipe.Comment
-
Awesome write up, thank you. I feel like I have baby back ribs down pat, as long as I don’t overcook them. Spare/StL ribs are still challenging me some.Comment
")


Comment