


I have always enjoyed the meat/pastry food delivery system (I'm a big fan of beef Wellington) and I have wanted to try making pork pies for quite awhile. After all, who wouldn't want to eat a food that has a hat style named after it?

Pork pies are directly descended from the raised meat pies of the medieval era. These medieval pies were often sweetened and contained fruits and vegetables. Often, the hard crusts were not eaten, they were simply a container for the filling. Sweet fruity pies mostly disappeared by the 19th century. Meat pies were also common in Colonial America.
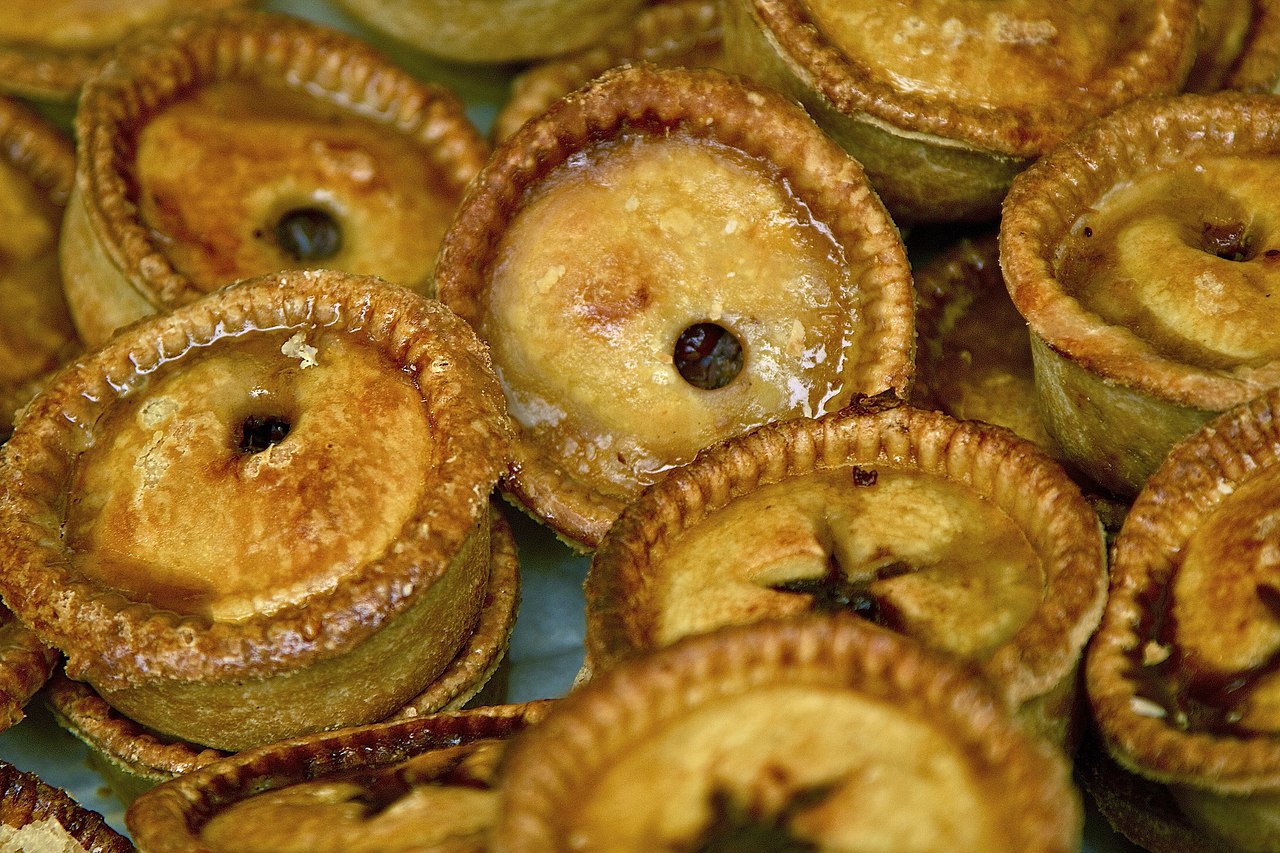
The modern pork pie uses a blend of seasoned pork and fat contained within a hot water crust (cooks into a hard stand alone crust) although some commercial ones use a soft crust. Seasonings vary by region and many pie makers use cured pork which gives the inside of the pie a pink color. Two of the more well known versions are the Yorkshire pork pie and the Melton Mowbray pork pie but just about every region in Great Britain has a version.
I settled on the Melton Mowbray style pie because they are simply seasoned and only require a few ingredients. Due to copycatting by commercial firms located in other parts of Great Britain and their use of nontraditional seasonings and cured meat, the Melton Mowbray Pork Pie Association applied for and was granted protected status under the European Protected Designation of Origin laws in 2008, meaning to be marketed as a Melton Mowbray pork pie, the pies must be made in the defined area in and around Melton Mowbray.
The Melton Mowbray pie does not use cured meat. The history of the Melton Mowbray pork pie differs depending on the source but one story is that in the late 18th century fox hunters used to take them on the hunt. They were impressed that the pies held up well in their saddle bags, spread the word, and a legend was born. The Melton Mowbray pie traditionally is hand formed around a wooden 'dolly' rather than formed using a pie press although in these modern times a pie press is often used by pie makers to save time and effort (is it wrong that after watching several youtube videos I started searching 'pie presses for sale' on ebay?). The simplest pie presses are manual and look like a heavy duty version of a bench mounted bottle capper used by home brewers. However, even old used ones needing restoration are expensive and shipping from Britain is high (their bases are cast iron). I didn't see any similar pie presses in America.
The seasoning is simple: salt and white pepper. When the pies cook the meat shrinks away from the crust so gelatin is injected after cooking to fill the empty spaces. The gelatin is made by boiling pigs feet (trotters) in water for several hours. The resulting strained liquid sets up when cooled. This gelatin adds to the richness and mouthfeel of the pork pie, to me it is one the most important ingredients. The pies are traditionally served cold or at room temperature. If heated the gelatin melts and makes a mess - ask me how I know. If you just don't want to do the pig feet thing, you can use chicken broth with gelatin added.
Now, for the recipe:
Makes
Four 4.5" diameter pies
Takes
Gelatin: 6-9 hours
Pork filling: 10-20 minutes
Pie Crust: 15-30 minutes
Baking time about 1 hour
Special tools
Spring form pans - 4.5" diameter X 2" tall. You can hand shape the pies too.
Electric mixer to make the crust
Ingredients
For the crust:
675 grams bread flour or other high protein flour (shoot for 13%)
175 grams lard
10 grams salt
300 grams water
1 egg beaten - for the egg wash
For the filling:
1000 grams untrimmed pork shoulder
1 tsp salt (I used pink Himalayan salt, might need a little more if using Morton's Kosher salt)
2 tsp ground white pepper
For the gelatin:
1 pigs foot (trotter)
1 liter water
1/2 tsp salt
optional - one onion, quartered, 1 tsp white pepper
Method
Make the gelatin
Place one pigs foot into a stock pot. Add water, bring to a low simmer and cover. Continue to simmer for 6-9 hours. Strain and reserve the liquid.
When I made this, I used a 2 gallon stock pot and 5 pigs feet, just barely covering them with water. I also added 1 quartered onion, 1 tsp salt, and 1 tsp white pepper. The resulting liquid was very rich and flavorful. I added the extra ingredients after reading a few recipes where the authors noted that some people were put off by the gelatin. Adding the extra ingredients makes it more palatable.
Make the crust
Place flour in a mixer bowl. Bring water, salt, and lard to a low boil. Turn on the mixer (use the dough hook) and add the water/lard mixture. Mix until uniformly incorporated. Let rest a few minutes until cool enough to work by hand. Turn out onto a work surface and form the dough into four balls. Let cool. Roll out to about 1/4" thickness and place into spring form pan. Trim the edges off but leave a little overhang along the edge of the pan. Use the left over trimmings to make the lid: roll out and use another spring form pan as a dough cutter to cut the lid. Repeat with the other three pans. Leave the crusts in the pans and set aside - they will stay in the spring form pans until done baking.
For the filling
Cut/grind the meat. Traditionally the meat is hand sliced into 1/4" cubes. This is very time consuming so I ran it through my grinder with a 1/4" plate (might use a 3/8" plate next time to get the desired texture). Add the seasonings and mix well by hand. Note: do not add the salt until you are ready to make the pies.
Make the pies
Place enough filling into the pie crusts to come about 1/4" below the top. Wet the edges with water or egg wash and place the lids onto the pies. Seal and crimp the lids to the pies. Poke a steam hole into the center of the lids. coat the lids with the egg wash. Bake at 400 degrees until golden brown and the internal temperature is 165 degrees.
While the pies are baking, strain the gelatin and reserve if you have not already done so.
When finished cooking, let the pies cool. Remove the spring form pan sides but they can stay on the bases until serving time. Using a funnel or injector needle, fill each pie slowly with the warm gelatin through the hole in the top. Refrigerate overnight and serve.
Pictures
Note: I did not take pictures of every step
Trotters boiling

Cooked pies fresh from the oven

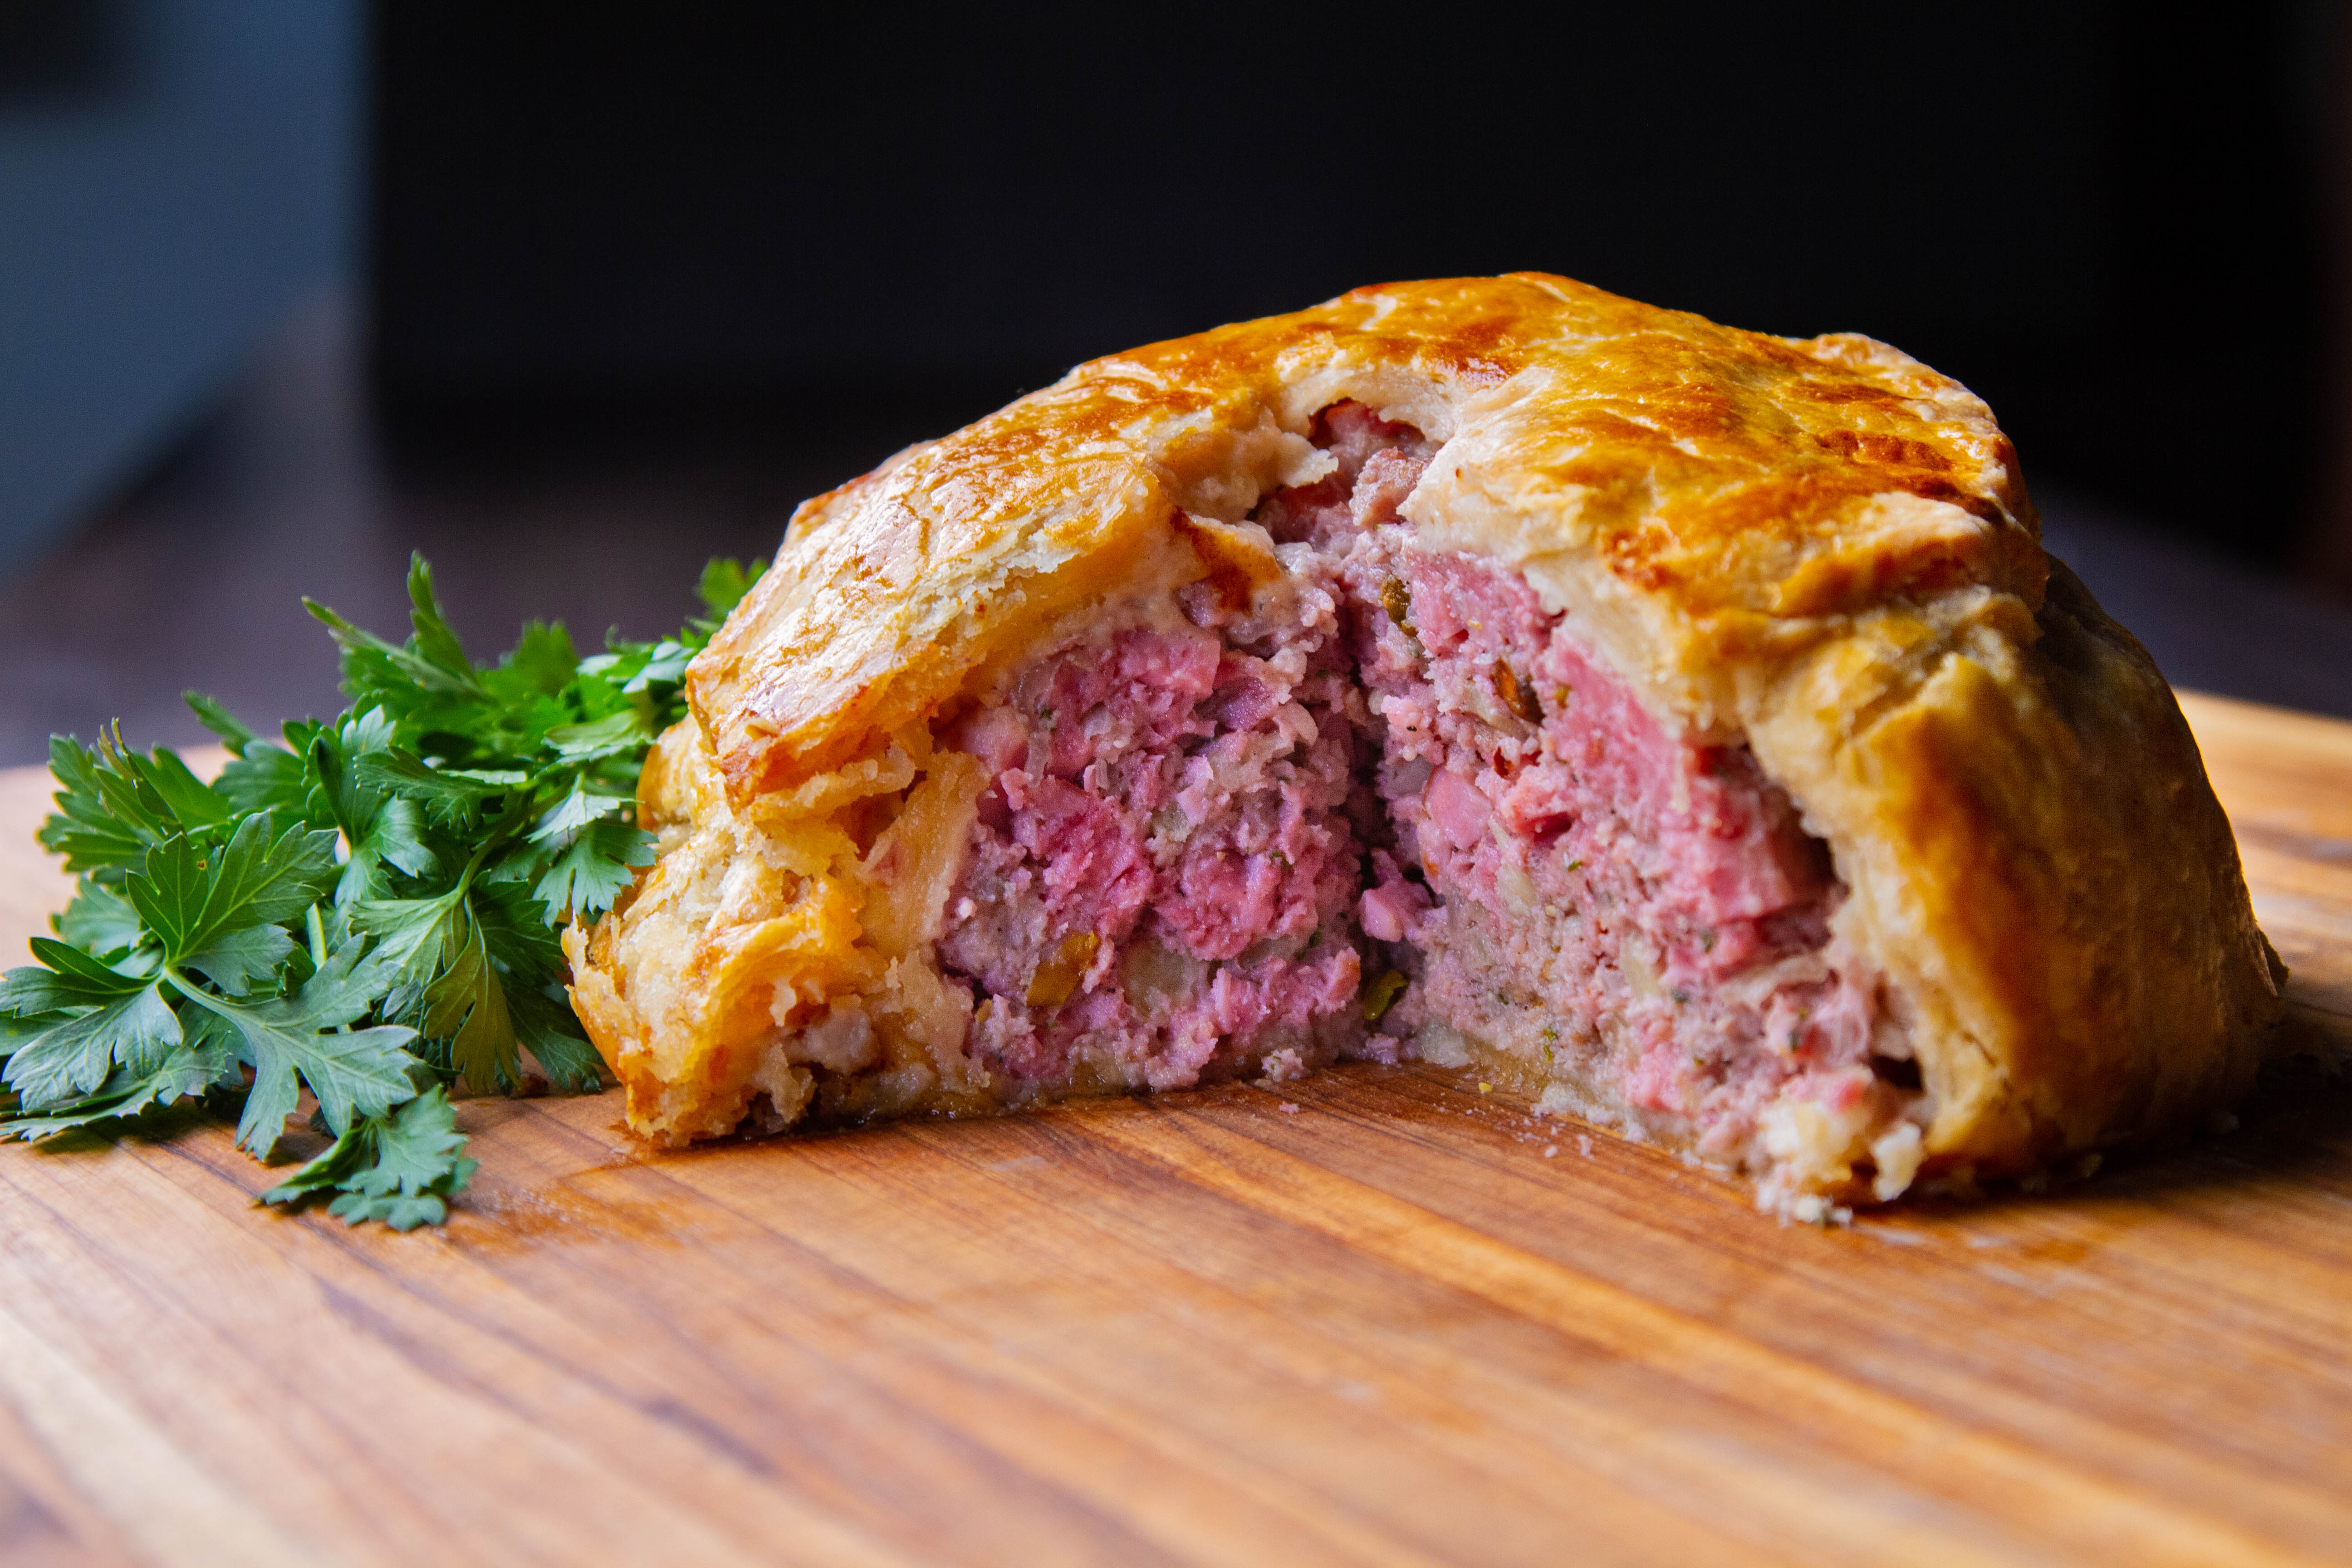
Finished product. These are probably twice as big as the ones produced in Melton Mowbray. I can barely eat a half at one sitting.

Resources
Pork pies are directly descended from the raised meat pies of the medieval era. These medieval pies were often sweetened and contained fruits and vegetables. Often, the hard crusts were not eaten, they were simply a container for the filling. Sweet fruity pies mostly disappeared by the 19th century. Meat pies were also common in Colonial America.
The modern pork pie uses a blend of seasoned pork and fat contained within a hot water crust (cooks into a hard stand alone crust) although some commercial ones use a soft crust. Seasonings vary by region and many pie makers use cured pork which gives the inside of the pie a pink color. Two of the more well known versions are the Yorkshire pork pie and the Melton Mowbray pork pie but just about every region in Great Britain has a version.
I settled on the Melton Mowbray style pie because they are simply seasoned and only require a few ingredients. Due to copycatting by commercial firms located in other parts of Great Britain and their use of nontraditional seasonings and cured meat, the Melton Mowbray Pork Pie Association applied for and was granted protected status under the European Protected Designation of Origin laws in 2008, meaning to be marketed as a Melton Mowbray pork pie, the pies must be made in the defined area in and around Melton Mowbray.
The Melton Mowbray pie does not use cured meat. The history of the Melton Mowbray pork pie differs depending on the source but one story is that in the late 18th century fox hunters used to take them on the hunt. They were impressed that the pies held up well in their saddle bags, spread the word, and a legend was born. The Melton Mowbray pie traditionally is hand formed around a wooden 'dolly' rather than formed using a pie press although in these modern times a pie press is often used by pie makers to save time and effort (is it wrong that after watching several youtube videos I started searching 'pie presses for sale' on ebay?). The simplest pie presses are manual and look like a heavy duty version of a bench mounted bottle capper used by home brewers. However, even old used ones needing restoration are expensive and shipping from Britain is high (their bases are cast iron). I didn't see any similar pie presses in America.
The seasoning is simple: salt and white pepper. When the pies cook the meat shrinks away from the crust so gelatin is injected after cooking to fill the empty spaces. The gelatin is made by boiling pigs feet (trotters) in water for several hours. The resulting strained liquid sets up when cooled. This gelatin adds to the richness and mouthfeel of the pork pie, to me it is one the most important ingredients. The pies are traditionally served cold or at room temperature. If heated the gelatin melts and makes a mess - ask me how I know. If you just don't want to do the pig feet thing, you can use chicken broth with gelatin added.
Now, for the recipe:
Makes
Four 4.5" diameter pies
Takes
Gelatin: 6-9 hours
Pork filling: 10-20 minutes
Pie Crust: 15-30 minutes
Baking time about 1 hour
Special tools
Spring form pans - 4.5" diameter X 2" tall. You can hand shape the pies too.
Electric mixer to make the crust
Ingredients
For the crust:
675 grams bread flour or other high protein flour (shoot for 13%)
175 grams lard
10 grams salt
300 grams water
1 egg beaten - for the egg wash
For the filling:
1000 grams untrimmed pork shoulder
1 tsp salt (I used pink Himalayan salt, might need a little more if using Morton's Kosher salt)
2 tsp ground white pepper
For the gelatin:
1 pigs foot (trotter)
1 liter water
1/2 tsp salt
optional - one onion, quartered, 1 tsp white pepper
Method
Make the gelatin
Place one pigs foot into a stock pot. Add water, bring to a low simmer and cover. Continue to simmer for 6-9 hours. Strain and reserve the liquid.
When I made this, I used a 2 gallon stock pot and 5 pigs feet, just barely covering them with water. I also added 1 quartered onion, 1 tsp salt, and 1 tsp white pepper. The resulting liquid was very rich and flavorful. I added the extra ingredients after reading a few recipes where the authors noted that some people were put off by the gelatin. Adding the extra ingredients makes it more palatable.
Make the crust
Place flour in a mixer bowl. Bring water, salt, and lard to a low boil. Turn on the mixer (use the dough hook) and add the water/lard mixture. Mix until uniformly incorporated. Let rest a few minutes until cool enough to work by hand. Turn out onto a work surface and form the dough into four balls. Let cool. Roll out to about 1/4" thickness and place into spring form pan. Trim the edges off but leave a little overhang along the edge of the pan. Use the left over trimmings to make the lid: roll out and use another spring form pan as a dough cutter to cut the lid. Repeat with the other three pans. Leave the crusts in the pans and set aside - they will stay in the spring form pans until done baking.
For the filling
Cut/grind the meat. Traditionally the meat is hand sliced into 1/4" cubes. This is very time consuming so I ran it through my grinder with a 1/4" plate (might use a 3/8" plate next time to get the desired texture). Add the seasonings and mix well by hand. Note: do not add the salt until you are ready to make the pies.
Make the pies
Place enough filling into the pie crusts to come about 1/4" below the top. Wet the edges with water or egg wash and place the lids onto the pies. Seal and crimp the lids to the pies. Poke a steam hole into the center of the lids. coat the lids with the egg wash. Bake at 400 degrees until golden brown and the internal temperature is 165 degrees.
While the pies are baking, strain the gelatin and reserve if you have not already done so.
When finished cooking, let the pies cool. Remove the spring form pan sides but they can stay on the bases until serving time. Using a funnel or injector needle, fill each pie slowly with the warm gelatin through the hole in the top. Refrigerate overnight and serve.
Pictures
Note: I did not take pictures of every step
Trotters boiling
Cooked pies fresh from the oven
Finished product. These are probably twice as big as the ones produced in Melton Mowbray. I can barely eat a half at one sitting.
Resources


Comment