Welcome!


This is a membership forum. Guests can view 5 pages for free. To participate, please join.

[ Pitmaster Club Information | Join Now | Login | Contact Us ]

Only 4 free page views remaining.

Announcement

Collapse
No announcement yet.

No Knead Dutch Oven Bread Recipe

Collapse
X
 
  • Filter
  • Time
  • Show
Clear All
new posts

    No Knead Dutch Oven Bread Recipe

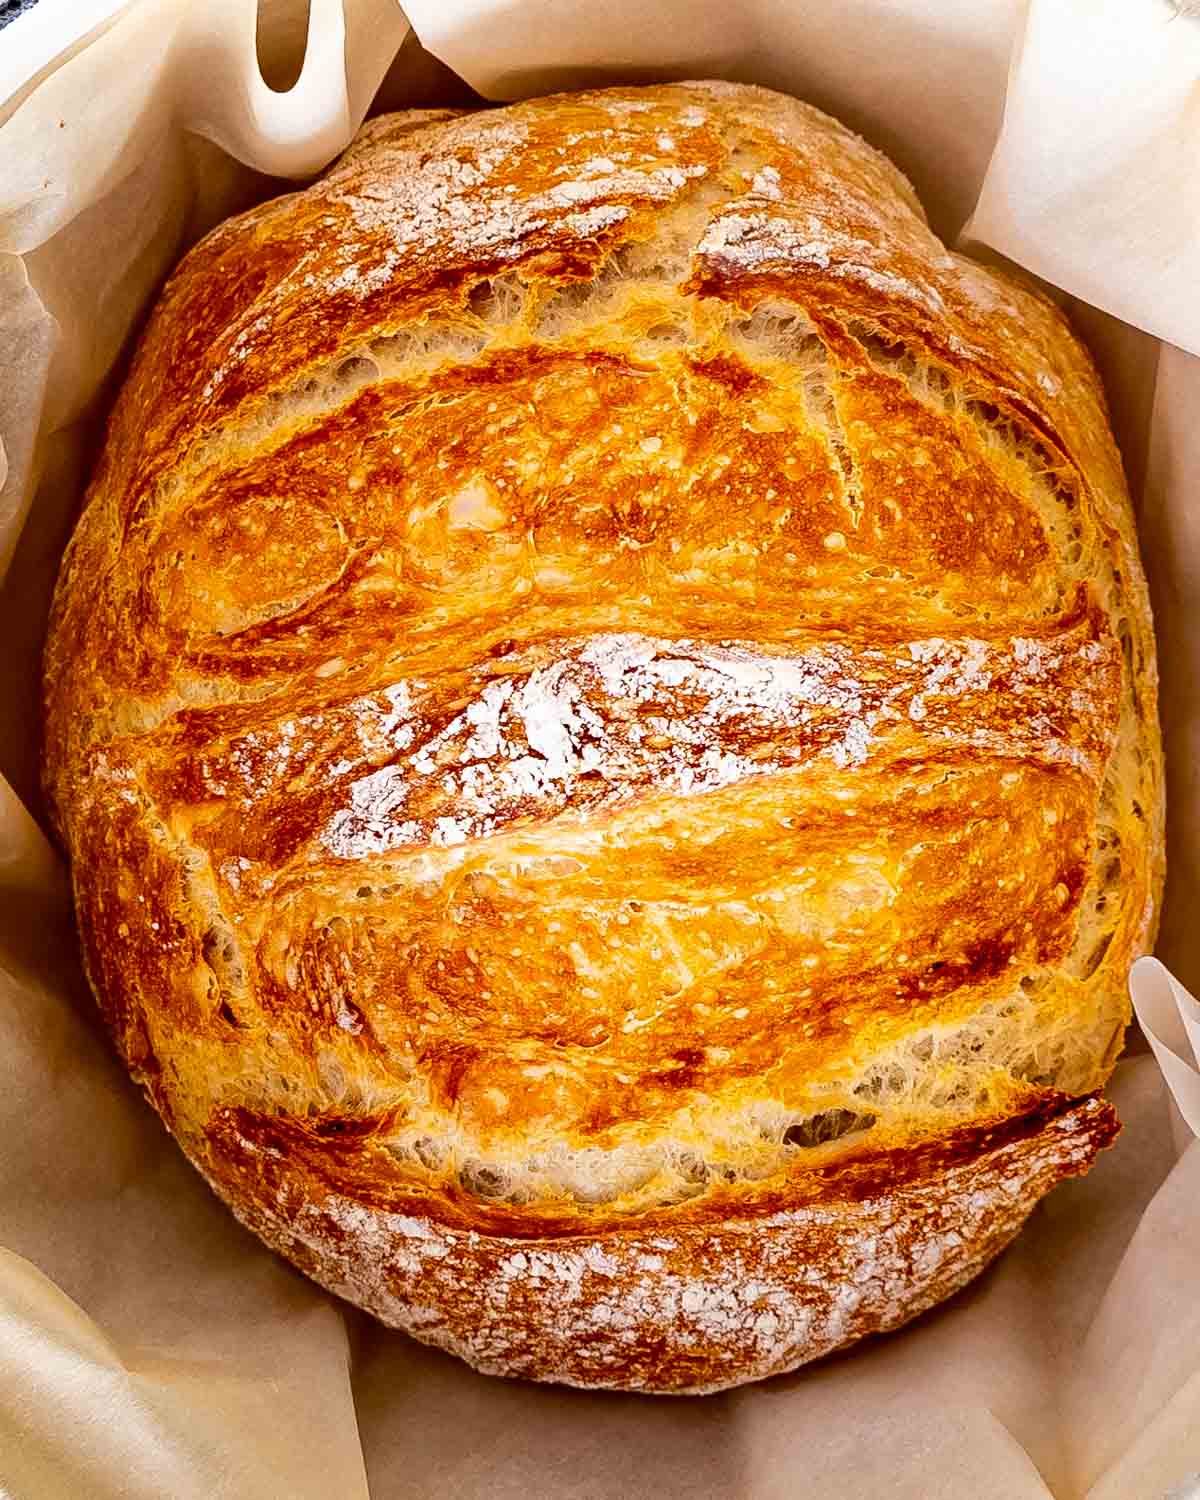
    I thought I would share the recipe I've been using, which is adapted from several generic no-knead bread recipes I stumbled across, most of which seem to refer back to a recipe published in The NY Times about 20 years ago. I've adapted it for a 5 quart dutch oven, versus the 3 quart called for in the original recipe.

    No Knead Bread

    Adapted from https://www.jocooks.com/recipes/no-knead-bread/

    Prep Time ~ 5 mins
    Cook Time ~ 50 mins
    Resting Time ~ 18 hrs
    Total Time ~ 18 hrs 55 mins


    Equipment
    Ingredients
    • 4.5 cups all-purpose flour (I prefer King Arthur All Purpose Flour)
    • 2 3/4 tsp salt
    • 1 tsp active dry yeast (I use Fleishmann's from a jar I keep in the fridge)
    • 2 1/4 cups water room temperature

    Instructions
    1. In a big bowl mix all the dry ingredients (flour, salt, yeast) together.
    2. Add the water, and combine using a spatula or wooden spoon, until mixed thoroughly.
    3. Cover the bowl with plastic wrap and let it sit on your counter to rise for 12 to 18 hours. I've gone as long as 24 without ill effects.
    4. Put the cast iron Dutch Oven into your indoor oven or on your smoker/grill, and preheat the cooker and Dutch Oven to 450F, with indirect heat. I usually let it preheat for 20-30 minutes. If using the oven, just turn it on, and once it reaches 450F, give it a few more minutes and the Dutch Oven should the ready as well.
    5. Remove the preheated Dutch Oven from the smoker or oven, and remove the lid.
    6. Flour your hands really well and sprinkle some flour over the dough in the bowl, and a little in the bottom of the dutch oven. Use your hands to separate the dough from the walls of the bowl - it will be sticky, and form into a ball as best you can. Don't worry about it being a perfect ball - this is "artisan" bread after all! I used to spread flour on the counter and try to get a perfect ball - don't sweat it, and just go from the bowl to the Dutch Oven, to keep the mess to a minimum.
    7. Drop the ball of dough into the pot, put the lid on, and put it back into the oven or smoker.
    8. Bake the bread for 30 minutes with the lid on.
    9. Remove the lid, and bake for another 20 with the lid off.
    10. Check the bread with an instant read thermometer, such as a Thermapop or Thermapen, and if it is around 200F, the bread is done.
    11. Pull the Dutch Oven from the cooker using insulated gloves or a potholder, and turn upside down to drop the bread into a pan or plate, or use tongs or spatulas to remove from the pot. It should come out easily.
    12. Let the bread cool completely before slicing and serving.
    Notes

    If your cooker is not at 450F, you will need to adjust cooking times longer or shorter, as appropriate. I make this using a well seasoned Lodge 5 quart Dutch Oven (Lodge #L8DO3 - not porcelain coated), and don't oil before the cook, and the bread never sticks. I apply a light coat of vegetable oil after rinsing the pot well after use, prior to putting in away, but that is about it. I've made this recipe now in my indoor electric oven, on my Weber Performer Deluxe, and on my Weber Genesis II using indirect heat.

    Adjust this recipe appropriately if you have a larger or smaller Dutch Oven.

    Click image for larger version  Name:	IMG_2043.jpeg Views:	0 Size:	3.06 MB ID:	864655Click image for larger version  Name:	IMG_2041.jpeg Views:	0 Size:	3.02 MB ID:	864656
    Last edited by jfmorris; June 18, 2020, 09:57 AM.

    #2
    Thanx - great lookin' boule.

    How do you measure the flour? Do you scoop it from the bag into your measuring cup or spoon the flour into the cup? This is important because measuring different ways will give you different amounts of flour which will affect the hydration %.

    I have tried both scoring the dough and not scoring the dough and I think scoring produces a higher rise and softer crumb. YMMV. Scoring allows the dough to expand with very little resistance. When you don't score, the rising dough has to build up enough pressure to crack the dough as it is setting. That just seems counter productive to me.

    I also prefer to cool on a cooling rack just to make sure the bottom doesn't soften due to moisture escaping from the bread. Again, YMMV
    Last edited by RonB; June 18, 2020, 10:16 AM.

    Comment


    • jfmorris
      jfmorris commented
      Editing a comment
      To measure the flour, I use a 1 cup measuring scoop, and dig it out of the bag, sorta packing it in and leveling the scoop against the side of the bag, trying to keep the flour off the kitchen counter as best I can.

      I did not score the bread above.

      I forgot to use the cooling rack in the kitchen, and just popped it onto the cutting board because it was there on the counter. Hopefully it suffered no ill effects, as it has been sitting there for an hour or more now.

    • gcdmd
      gcdmd commented
      Editing a comment
      Go by weight if you have a digital kitchen scale. If you don't, you should get one.

      4.5 cups (570 grams) all-purpose flour (I prefer King Arthur All Purpose Flour)
      2 1/4 cups (533 grams) water room temperature (BP = 94%),

    #3
    Yowza I could put a "hurtin" on that. Nice job.

    Comment


      #4
      Beautiful loaf, especially compared to the ugly mess I baked this morningšŸ¤£.u
      Last edited by Texas Larry; June 18, 2020, 12:01 PM.

      Comment


      • IowaGirl
        IowaGirl commented
        Editing a comment
        Ah, but I bet it tasted really good! Looks ain't everything!

        I'm a soap maker and I haveta say some batches don't come out so good as far as looks, but it's still nice soap in that it gets a body clean and smells nice.

      #5
      Gorgeous! Was planning to do one in the next few days anyway. This definitely put me over the top.

      Comment


        #6
        Nice write up. I have a lodge porcelain enameled dutch oven. Will that work? Would I need to rub oil on the inside if so?

        Comment


        • jfmorris
          jfmorris commented
          Editing a comment
          With the seasoned cast iron, sticking is not an issue. With porcelain, I don't think it will be an issue if you preheat and sprinkle a little flour in the bottom before dropping the dough in. You could lightly oil it I suppose, but sticking is usually due to not pre-heating and having the Dutch Oven or pan hot enough.

          The recipe I reference uses a 3 quart Dutch Oven that appears to be enabled:

          No Knead Bread - no kneading required, 4 simple ingredients, baked in a Dutch Oven! The result is simple perfection, best bread ever.

        • Porkies
          Porkies commented
          Editing a comment
          I have a lodge enameled dutch oven, as well. I put the dough on parchment paper, score it, and drop into the pre-heated DO.

        #7
        Nice!!! Maybe I'll get up off my behind and make some bread this weekend.

        Comment


          #8
          Looks wonderful. I have a recipe but will surely try this one.

          Comment


            #9
            Nice bake! I follow a very similar recipe. Mine comes from the King Arthur website and I cut the ingredients in half to make one instead of 2 or 3.

            Comment


            • jfmorris
              jfmorris commented
              Editing a comment
              This recipe makes one loaf for a 5 qt dutch oven. The original recipe used 3 cups flour and was for a 3 quart dutch oven.

            • Porkies
              Porkies commented
              Editing a comment
              I will have to try your recipe.

            #10
            Looks great, I love this type of bread. Have you ever used parchment paper in the bowl you room ferment in and then place the dough-ball and paper in the scorching hot Dutch oven? I have been making it this way for a while and been wondering if there is a difference between the two methods. Seems like having to grab the ball out of the bowl and plopping into the oven would cause some degassing of the ball. Have you noticed that at all?

            Comment


            • jfmorris
              jfmorris commented
              Editing a comment
              Haven't tried that method, but might at some point. I knocked it down some making a ball, but it rose during baking a good bit, and plenty of holes of various sizes in the bread, so I think it worked out.

            • RobertC
              RobertC commented
              Editing a comment
              I've done both. It depends, in part, on the initial hydration percentage. If I get up above 66% then I use parchment for the final pre-bake rise. For hydration %age less than that, the texture is a bit more robust so I can lift and place in the dutch oven without parchment.

            #11
            Thanks for the recipe. We have it sitting on the shelf now waiting for the 18 hours to pass so we can bake it tomorrow morning.

            Comment


            • jfmorris
              jfmorris commented
              Editing a comment
              Let me know how it turns out!

            #12
            I do something similar. Baked a rye bread yesterday. I basically use the technique in this video:


            but I use the overnight rise now, mainly because I think of making the bread just before it's time to go to bed, and if I wait until the morning I will forget! I have found there's very little if any difference between an 11-12 hour rise vs 18.

            Her recipe uses 3 cups of flour. For the rye, I use 1/2 cup of rye flour and 2.5 cups of AP flour and 1 tbs caraway seeds.

            Click image for larger version

Name:	rye5.jpg
Views:	253
Size:	88.4 KB
ID:	865958

            Click image for larger version

Name:	rye5-sliced.jpg
Views:	242
Size:	29.9 KB
ID:	865957


            Comment


            • hoovarmin
              hoovarmin commented
              Editing a comment
              Looks really good!

            #13
            Iā€™d eat it ,,,,,with lotsa butter !!!!!

            Comment


              #14
              Okay, just assembled my dough for tomorrow. Decided to add some sunflower seeds for a little texture.

              Comment


              • jfmorris
                jfmorris commented
                Editing a comment
                Jim White so sorry to hear of your lack of success. My house is usually at 72 this summer, and I've not seen a failure of the yeast like that.

              • Jim White
                Jim White commented
                Editing a comment
                jfmorris I let things run in the 77 to 80 range in summer. My wife still liked the bread. I was put off by how tough the bottom crust was to cut and how dense it was. Will keep fiddling. i still think the sunflower seeds will be fun in one done right.

              • jfmorris
                jfmorris commented
                Editing a comment
                Jim White maybe cut the recipe back and try a smaller loaf until you get things right.

            Announcement

            Collapse
            No announcement yet.
            Working...
            X
            false
            0
            Guest
            Guest
            500
            ["pitmaster-my-membership","login","join-pitmaster","lostpw","reset-password","special-offers","help","nojs","meat-ups","gifts","authaau-alpha","ebooklogin-start","alpha","start"]
            false
            false
            {"count":0,"link":"/forum/announcements/","debug":""}
            Yes
            ["\/forum\/free-deep-dive-guide-ebook-downloads","\/forum\/free-deep-dive-guide-ebook-downloads\/1157845-paid-members-download-your-6-deep-dive-guide-ebooks-for-free-here","\/forum\/the-pitcast","\/forum\/national-barbecue-news-magazine","\/forum\/national-barbecue-news-magazine\/national-barbecue-news-magazine-aa","\/forum\/national-barbecue-news-magazine\/national-barbecue-news-magazine-aa\/bbq-news-magazine-2019-issues","\/forum\/national-barbecue-news-magazine\/national-barbecue-news-magazine-aa\/bbq-news-magazine-2020-issues","\/forum\/national-barbecue-news-magazine\/national-barbecue-news-magazine-aa\/bbq-news-magazine-2021-issues","\/forum\/national-barbecue-news-magazine\/national-barbecue-news-magazine-aa\/bbq-news-magazine-2022-issues","\/forum\/national-barbecue-news-magazine\/national-barbecue-news-magazine-aa\/current-2023-issues","\/forum\/national-barbecue-news-magazine\/national-barbecue-news-magazine-aa\/current-2024-issues","\/forum\/free-deep-dive-guide-ebook-downloads\/1165909-trial-members-download-your-free-deep-dive-guide-ebook-here"]
            /forum/free-deep-dive-guide-ebook-downloads/1165909-trial-members-download-your-free-deep-dive-guide-ebook-here