
Well coreyo, thanks a lot. After reading this entire thread I just informed my wife that we're moving to Detroit. She looked at me like I was crazy and asked me what possible reason I could have for wanting to move to Detroit. When I told her "the pizza" she shook her head and walked away with a disgusted look on her face. Yep, I'm sleeping on the couch again tonight.
-
-
This weekend was a good weekend. I've made progress on several fronts. First off, I found a $3 cheap non-stick 8" x 8" Oneida cake pan at the Grocery Outlet. It seems identical in every way to the $6 one that I purchased at Albertson except for the placement and brand on the logo. The dimensions appear to be identical, and they stack inside one another perfectly. These are proving to be viable options for making Detroit style pizza at home:
I think that I have found a near perfect dough recipe. Alton Brown proves himself over and over to have the superior dough recipe. I used elements from the DSPC recipe to tweak it and the results this week were nearly perfect wrt composition. This is likely to be my final dough recipe for this thread:- 75g finely ground semolina flour
- 615g bread flour
- 9g active dry yeast (1 standard packet is fine)
- 30g sugar
- 15g kosher salt
- 460 grams bottled water
- 15 grams olive oil
King Arthur Unbleached Bread Flour is expensive, but one of the best that I've found. I also highly recommend that you buy yourself a brick of SAF yeast. It's very cheap and keeps in your freezer for years. My second-favorite yeast brand is Hodgson Mill.
Thanks to both Alton Brown: https://altonbrown.com/pizza-dough-recipe/
And DSPC: https://www.youtube.com/watch?v=HSe1W_jsRG8
Near Perfection:
My first bake this week was perhaps the best pizza that I have made so far. It might be about as close to ideal as I can hope to get. If I can reproduce these results consistently in the coming weeks, I will be satisfied. I preheated the Roccbox to about 415C (on the integrated thermometer). I then dialed the flame back as low as it would go and placed the pizza into the Roccbox. I set my phone up as a stopwatch timer and rotated a quarter of a turn (clockwise) every 45 seconds. Once I had achieved a 45 second bake on all 4 sides, I killed the flame entirely, gave the pizza another half turn, then allowed it to bake for 1 more minute. After a total of 4 minutes, this was the result:
The crust was fantastic. The overall crunch factor was very high while the center was steamy and pillowy. The caramelized cheese tasted good as well as the thick-cut pepperoni underneath. The cheez-it edges gave an extra crunch with a pleasant extra punch of flavor.
There are a few problems here: As before, the pan warped under the rocket heat, cupping upward around the edges. You can see that the center is significantly darker. It didn't seem to affect the flavor. You can also see that the cheez-it crust around the edge of the pizza is a little bit overly dark. Any actual burnt flavor was subtle if present at all. As I've stated before, the best tasting crust will be darker than you might think.
Pan Material Matters:
I cooked one more pizza in the Roccbox using the aluminum Lloyd pan. As mentioned before, the heat conductivity of this pan is very high making it more sensitive to temperatures. The pan also does not warp like the cheap pans, so the darkness levels on the bottom of the crust are much more uniform. I noticed that the cheese on top caramelizes very quickly, so I cut the rotation interval down to 30 seconds. The Roccbox had risen all the way to 450C on the dial, and this may have also been part of my problem. I dialed the flame back to its lowest setting and placed the pizza in the Roccbox. I rotated the pizza a quarter turn every 30 seconds. After a full rotation (2 minutes), I cut the flame entirely and rotated the pan every 30 seconds for another 2 minutes. After 4 total minutes (and 2 full rotations), this was my result:
As you can see, the crust was overly dark on the bottom, and definitely overly dark on the side. While it's borderline black, it was actually still pretty good. It's a bit like a Neopolitan style pizza in that the charred black bits are actually a feature, not a bug. The crunch-factor from the overly-dark bits outweighed any slight burnt flavor. Still, the goal moving forward will be to mitigate the heat a little bit with either lower temps or shorter cook times.
Trials In The Kitchen Oven:
In 2 weeks, I will be headed to St. Augustine, Florida for my cousin's wedding and family reunion. I will be showing off my new-found Detroit-style pizza skills without all of my ideal equipment. The goal will be to pick up a bunch of cheap, non-stick 8" x 8" cake pans and cook them in the condo oven (which I'm sure will be abysmal). In a broader sense, I know that many of you reading this thread will not go out and purchase a pizza oven. For these reasons, I'd like to provide a solid alternative for everyone. This week I attempted 2 pizzas in my horrible kitchen oven. I will be attempting 2 more again next week, and I will share the results of my travel pizza at the end of this month.
As discussed, the problem with Detroit-style pizza is that you need extra heat at the bottom of the pan if you want a crispy bottom to your crust (and you do want a crispy bottom to your crust). Simply baking the pizza in the center rack will cause a light, flaccid crust bottom. My idea for this week was to move my pizza stone to the very bottom rack (only about an inch above the heating element). Directly on top of that, I would set my 10" square cast-iron skillet. After preheating the oven to its max temperature for an hour, I switched it to broil for about 20 minutes to see if I could heat the stone and pan up even hotter. I then placed the 8" x 8" square pan directly on top of the 10" cast iron skillet and turned the oven back to the bake setting, allowing the pizza to bake for about 15 minutes total:
Cast-Iron:
The setup above shows how the cast-iron Bayou Classic pan fits perfectly in the 10" Lodge square skillet. Unfortunately, the 12" standard round cat-iron skillet had side walls that were too tall, and the handles on both the cast-iron and cheap cake pans would not fit. After about 5 minutes, I gave the skillet half a turn and loaded the pizza up with sauce and pepperoni. While the top and sides of the pizza were pretty good, the bottom of the crust was still abysmal:
Not that this pizza was bad. Overall, I'd still be impressed if it was my first introduction to Detroit style pizza. However the overall crunch-factor simply was not there. The only crunch came around the cheez-it edges of the pizza. The cast-iron pan is once again creating too much of a heat-buffer for the bottom of the crust.
Cheap Cake Pan:
I used the same method with one of the cheap 8" x 8" non-stick cake pans. I cooked the pizza for 15 minutes, rotating about half a turn halfway through the bake. The thinner pan yielded better results. The following photos provide a very visually appealing specimen. The result was actually pretty decent in most respects:
The bottom of the crust was not bad. It was still significantly lighter than is ideal, but it provided a small bit of crunch to every bite. The caramelized toppings and cheez-it sides of the crust were just about right, and I had no complaints. I clearly need to find a better solution for applying heat to the bottom of the crust, but at least this provides hope for future trials.
The Lineup:
Each lineup shows the pizzas in the order they were presented in this post from left-to-right. First, let's compare the crust bottoms:
The Roccbox clearly yields a darker crust. The overall Roccbox specimens are superior and the difference is dramatic. The pizza on the far left has a near-perfect crust bottom.
Next, let's look at the cross sections:
Here we see again that the lower temperatures of the kitchen oven (two pizzas on the right) give a higher rise.
Roccbox Lineup:
The Loyd pan has consistently produced a slightly thinner pizza than the others. At first I thought that this is because the crust was frying and setting more quickly because of the faster initial heat-transfer. I am now noticing that the dough simply doesn't rise as high during the bench proofing phase. I think this is a combination of the rectangular shape (vs square) and the fact that the sides have a much more dramatic flare to them.
Kitchen Oven Lineup:
The cast-iron pan has the highest rise. This may be solely due to the fact that it seems to promote higher rises during the bench proofing phase. You can see that the air pockets are slightly larger than those baked in the Roccbox at higher temperatures. While this is more ideal, there is a tradeoff: Because the bread has longer bake times, the entire pizza seems to heat more evenly, providing more heat to the center of the pizza. This allows for more of the moisture in the dough to escape and the center to set more firmly. While it has a nice airy rise, the sensation on the tongue is not quite as soft as those baked under higher temperatures. It also lacks that sensation of steam escaping in every bite when you eat a slice fresh out of the oven. Anyone familiar with Neopolitan style pizza understands that this is why the rocket-like high temperatures are so important. The difference between the two is less apparent once the pizzas has cooled (with respect to the center of the crust).
For Next Week:
- I will do a couple more pizzas in the kitchen oven. I'm going to try to remove both the pizza stone and the casti-iron baking "steel". The idea here is that the heating element will only be about an inch or so from the bottom of the pan and might do a better job heating it directly.
- I think that I can go with an even shorter bake in the Roccbox. I might go down to 3 minutes, or even 2 minutes in the case of the aluminum Lloyd pan. I might even be able to kill the flame as soon as the pan goes in the oven and just bake on the residual heat. This will probably take several more weeks to sort out.
-The 8" x 10" pans seem to require an extra ounce or so of dough to get the same thickness/lift as compared to the 8" x 8" pans. I suspect that the rectangular shape and dramatically flared sides have something to do with this, given that the effective area at the bottom of the pan is about the same as the 8" x 8" pans.
- I'm going to try ordering an actual steel pan 8" x 10" pan from the DSPC. I'd like to compare the difference between the Aluminum Lloyd pans and the actual steel. My hypothesis is that the heat conductivity of the steel will be lower than that of the aluminum. In the case of the ultra-hot bakes in the Roccbox, this might be beneficial.
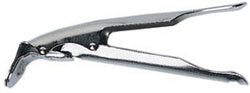
- Since I'm doing a lot of baking in the Roccbox in pans with no handles, It has become evident that I need some pan grippers
Here are some links to what I'm considering:
As usual, thanks to everyone following this thread. I'll try to post again next week.Comment
-
Your write-ups are fantastic. I like that you are going to use a stone to create extra heat for cooking the crust. It's my go-to method when cooking deep-dish pies in the oven. It works and you should be able to achieve similar results as what you've achieved in your pizza oven, albeit over the course of 20-25 minutes.
BTW - We celebrated my mom's birthday yesterday and went to the Tigers game (they lost 12-2 yuck!) and we went to Buddy's afterwards for dinner. The pizza was outstanding!Comment
-
Impressive documentation and keeping your experiments controlled. Curious if the Roccbox is a good cooking medium for the Detroit style pizza. To me, it might be better served with a Neapolitan style crust at 60 or 70% hydration? (Depending on oven temperature...) Your experimentation has stimulated me to experiment with that style of pizza after I "master" the Neoplitan, and I'm almost there with that! Thanks for the great posts.Comment
-
I was surprised too. If you read the entire thread, you'll see that it was the experiments with my Camp Chef Italia Artisan pizza oven that led me to the conclusion that high heat was better. I originally got the crust a little bit too dark and found that it was surprisingly better than a prettier, lighter golden brown. It also allows for lightning fast bake times. Loui's pizza uses a 650F oven, presumably for the same reasons. I suspect a Chicago Style pizza would not fare as well in this heat.
-
-
Hi guys, I'm sorry for the delay. I have a few weeks worth of pizza to report. I've had guests, to whom I served my pizza. We also went to Comic-Con this past weekend. I did not have a chance to make my oven pizzas while I was on travel in Florida. The logistics simply did not line up. However, I do have some promising results to report from 2 weeks ago. I'd like to start with an exciting win for those of you who just want to try this in their home oven:
The "Good": Kitchen Oven Success!
If you've been reading, you'll know that I've improved upon Detroit Style pizza by using a traditional, very hot, Neopolitan style pizza oven and a cook time of just 3 and a half minutes. It should be noted that traditional Detroit Style pizza is cooked in a deck oven. The Detroit Style PIzza Company has this listed as a necessity in its tutorial and training services. Here's how a really nice version of a deck pizza oven might look:
[original found here: http://mpmfegblog.blogspot.com/2014/...-downers.html]
You'll notice that the floor of each compartment acts as a pizza stone that stores up a lot of heat. When preheated properly, this gives the bottom of the crust a nice dark crunch. My idea was to try and simulate a deck oven. While the common kitchen oven has a cavity that is much taller than a deck oven, you'll know by now (if you've been following along) that the trick to getting good Detroit Style pizza is to make sure that there is a lot of heat coming up directly through the bottom of the pan. A dark brown crust that is frying in a thin layer of olive oil is absolutely essential. I haven't had any problems getting a nice brown cheese or a nice crunchy cheez-it crust around the outside of the pizza in my trials before. However that bottom can be very tricky. My setup was simple: Remove all oven racks but one. Place it in the bottom most position, and place a thick pizza stone on that bottom rack as close to the bottom heating element as possible.
For this experiment, I used one of the cheap, non-stick 8"x8" cake pans that I've found work so well. I preheated my oven as high as it would go (only 500F). Once the oven reached its final temperature, I gave it another hour to ensure that the sides of the oven (and most importantly the pizza stone) were retaining as much heat as possible. I constructed my pizza in the usual manner (a few tablespoons of olive oil in the pan, placed the dough on top of the olive oil, stretched it out to the sides of the pan, covered it and allowed it to proof for 3 hours, then carefully added my toppings: oregano, pepperoni, and cheese ... in that order). I placed the pan in the thoroughly preheated oven directly on top of the pizza stone and allowed it to bake for a total of 15 minutes giving it a 180 degree turn at the halfway point. Here were the results:
IT WAS BEAUTIFUL! Now I should qualify by saying that they did not eclipse the results that I achieve using the Roccbox. If you want ideal results, you're going to need a specialized oven. However, if this had been my first introduction to Detroit Style pizza, I would still have had the same reaction. Whereas I'd rate my Roccbox pizza at a 9 out of 10, This pizza was a solid 7.5 - 8 out of 10. As usual, a well composed, oven baked pizza does give more visually appealing results. You can see just how pretty the edges of the crust look with the cheesy legs lifting upward. The cheez-it crusty edge looked beautiful and had an excellent crunch. Perhaps most surprising was the bottom of the crust. You can see just how dark and crunchy the results were. Even though the top heating elements were as far away from the top of the pizza as possible, you can see that the cheese still browned and caramelized very nicely. As with previous experiments at lower temperatures, the crust got a nice lift as it rose and set with large foam cells.
All-in-all, you can see that this pizza embodies every element from the Detroit Style checklist. All, that is, except for one: Here in lies the difference between doing a very fast, very hot cook in a special pizza oven and doing a 15 minute cook in a traditional oven. While still pretty much excellent, the center of the crust simply did not have the light, fluffy, airy, steamy texture that comes with very fast, very hot cooks. When I remove this pizza from a nuclear hot Roccbox, the center of the crust dough is still slightly undercooked, only just barely finishing from the steam that's trapped in the center of the crust as I remove it from the pan and slice it fresh. When I bite into that crust, the center is wispy and pillowy, and fresh steam escapes into my mouth heightening the flavor and ethereal texture of the crust. This pizza, out of my kitchen oven unfortunately did not have that magical quality. To be fair, it was good. The overall composition of the pizza was still light, and I could easily eat 4 pieces before becoming uncomfortably bloated. For those of you who are able to accomplish excellent Detroit Style pizza in your home oven, this is the final level that you will never be able to achieve.
Note: I had some chicken thigh meat and decided to throw it onto the pizza. I seasoned it and marinated it for several hours in Italian dressing. I then did a quick blackened sear in a very hot cast iron skillet and then cut it into strips. It was pretty fantastic. Surely this would make for a great pizza topping right?! Unfortunately, after 15 minutes at 500F on top of a pizza in a hot oven, the chicken was quite overdone and dry. It wasn't "BAD" per se, but the magic that was the moist blackened chicken was no longer. But I digress...
Generic Stainless Steel Pans:
If this pizza hadn't turned out so well, the night would have been an absolute disaster. Let's move to the not-so-pleasant part of the evening. I purchased the following 2 fairly cheap "stainless steel" pans from Amazon, largely out of curiosity:
https://smile.amazon.com/gp/product/...e=UTF8&psc =1
https://smile.amazon.com/gp/product/...e=UTF8&psc =1
Here is a picture of what arrived:
Here they are compared to my other pans:
I did my due diligence to season them. The procedure involved rubbing a very thin layer of flaxseed oil all over them, baking them at 500F for an hour, then repeating the process several times. Here's what they looked like after that process:
The "Bad": Cheap Stainless Steel Pan Disaster #1:
I cooked the 8"x8" generic stainless steel pan in the kitchen oven. The result was a disaster. No significant heat was able to penetrate the bottom of the pan. To make things worse, the crust stuck so badly that it ripped around the edges as I tried to scrape it out.
The highly rounded edges made it so difficult to release the sides of the pizza that I just threw this pan right into the garbage can, never to use it again. The pizza flopped and fell apart as I tried to eat it. The texture was not good.
The "Fugly": Cheap Stainless Steel Pan Disaster #2:
I cooked the second generic stainless steel (8"x10") pan in the Roccbox at a very high temperature. This pizza was an even greater disaster than the first one. This pan also stuck to the crust pretty badly. The heat transfer was so bad that the under-side of the crust was almost raw. The cheez-it crust around the outside was almost non-existent:
I could tell that the crust was very underdone when I pulled it out. On the advice of another poster, I tried placing the pan on an induction burner to see if I could crisp up the bottom of the pizza post-hock. I put the burner on a medium-high setting and placed the pan on the burner. I began to smell burning within just a few seconds, and I pulled the pizza off after a total of about 40 seconds. At this point there was smoke and a very strong burnt smell. I still do not understand how the pan and dough could become this hot in less than a minute. Here was the result:
Here you can see how the parts over the center of the induction burner became black, while the rest of the dough was practically raw. The pan became badly burned as well. Here is how the pan looked after I scraped and cleaned it:
I can say with certainty that I would not recommend either of these pans. I also don't recommend just going out and buying any stainless steel pan for making pizza. Lastly I do not recommend trying to crisp up the crust using a stove burner. Some of our friends had said that they might stop by for some of my pizza that night. Luckily, they did not...
For Next time:
I have one more completed experiment to document, and I hope to get that done by the end of the week. Sorry for not posting for so long, and I hope to properly conclude this thread soon.Comment
-
Thanx again for doin' this.Comment
-
Very enjoyable, an informational, Brother!
I appreciate alla yer time investiture, and yer well written article...probly save me countless aggravations, long-term!
Comment
-
Great stuff, saving us all aggravation down the road. Thanks for doing this.Comment
-
the Pizza bible has a great step by step on many styles but especially Detroit Pizza. For the dough he adds a touch of Diastatic Malt and it makes a big difference,Comment
-
Hmm... never even heard of it. Just read up on it a little bit. My secret weapon thus far has been SAF "quick rise" yeast. I don't actually do a quick rise, but I find that it proofs better than anything else after a 24 hour cold rise in the fridge. Substituting a small amount of bread flour with semolina flour has brought me one step closer. I'll have to buy some and see if it alters the crust in any way beyond my current methods. I suspect that something like this really helps same-day rises.Last edited by coreyo; July 26, 2019, 02:54 PM.
-
-
Oh MOMMA! I just found another rathole. Sorry dear, the house and yard are going to have to wait.Comment
-
This has been a really fun journey to follow.Comment
-
Over the past several weeks, I've managed to come up with a relatively surgical procedure that has given me consistently reproducible results. I have achieved a great product with great taste and a great texture. My wife, who does not typically like pizza, after some initial cynicism, has come to look forward to the humble cheese pizza that I make for her every weekend. She's even beginning to reheat the leftovers the next day. Whereas my initial results ranged from great success to abject failure, I am now happy to show off my pizza to friends and family, confident in the results that I will achieve when they visit.
This past weekend, A friend of mine that I hadn't seen in over a decade was in-town on business travel. I invited him over. That night, I made my Detroit-Style pizza, and it turned out on par with all of the best pizzas that I have ever made. I was pleased as soon as I bit into the first pizza that came fresh out of the oven. As he took his very first bite of fresh, hot Detroit-Style pizza, I could hear the crunch from all the way across the table. Nailed It! By the time we got to the 4th pizza, he wouldn't even try it because he was "full"... What a wuss!
Another Pan Experiment:
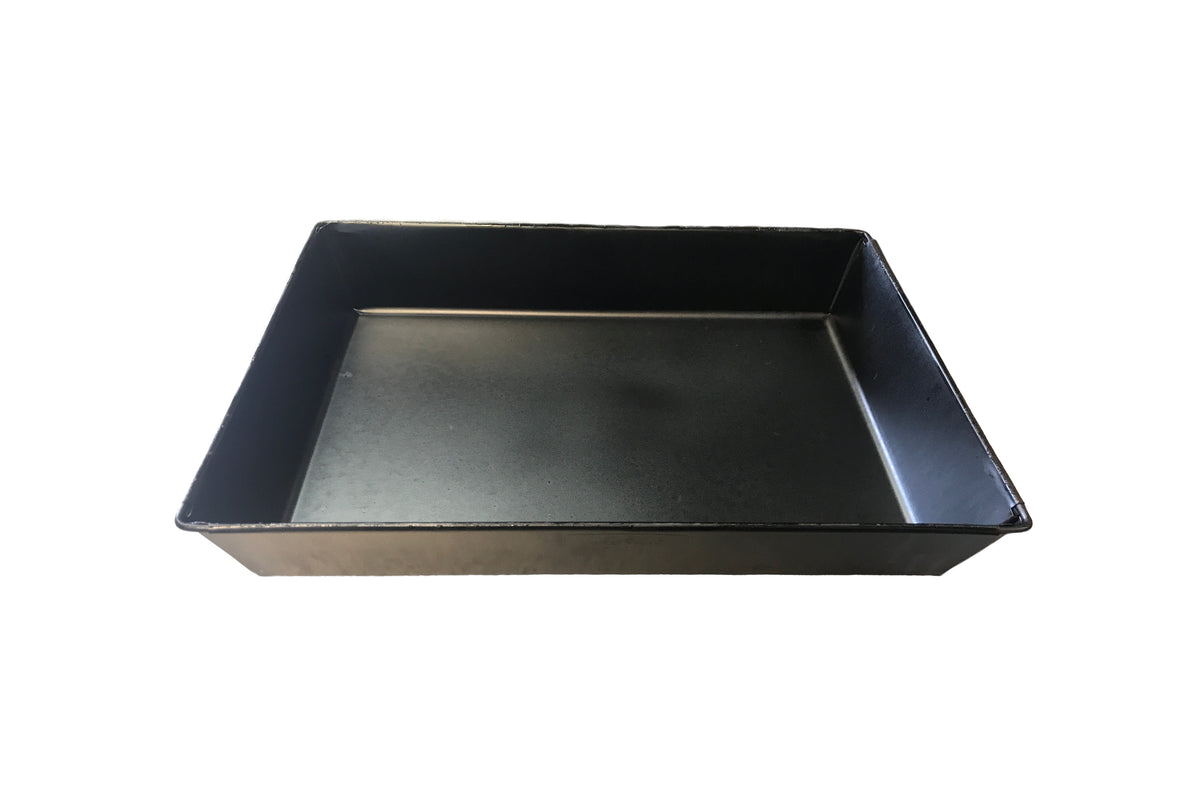
Several weeks ago, I purchased the last promising pizza pan on my list:
https://detroitstylepizza.com/produc...yle-pizza-pan/
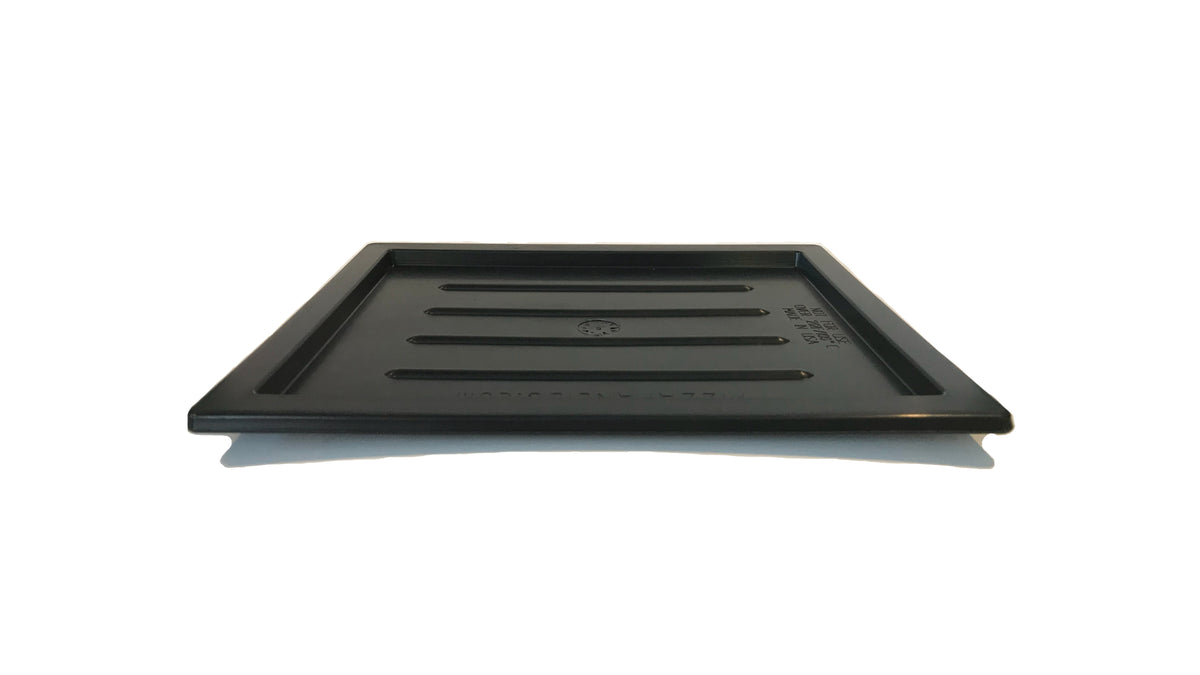
And a lid to go with it:
https://detroitstylepizza.com/produc...an-lid-8-x-10/
These pans can also be bought directly on Amazon. It was in one of the Amazon reviews of this particular pan that I actually first learned about the Lloyd pans (i.e. "don't buy this pan, go with Lloyd pans"). There were 2 major gripes in the amazon reviews of this particular pan: One of them had to do with sticking and rusting. Honestly, if your'e having this problem then you simply don't know how to season and care for steel or cast-iron pans. The second criticism, however, was a bit more troublesome. They noted that the pan would warp under heat. This has already caused some problems for me, but I bought the pan anyway. Here's what it looked like when it arrived:
You can see from this last picture that the build quality is not very high. They've simply taken very thin steel sheet and folded it into a pan shape. The pan itself was not a rectangle. It was technically a quadrilateral because none of the angles were 90 degrees and none of the sides were parallel. At almost half the price of the Lloyd pans, I honestly am not very bothered by this. I don't care if my pizza is a perfect rectangle as long as it cooks the pizza well. The pan lid (used during the proofing stage) is a thin plastic instead of aluminum.I find this to be okay. It does the job and held up in the dishwasher. I suspect it will eventually crack, but they are so cheap that they can be easily replaced. It even fit nicely on my Lloyd pan, which makes it a cheaper alternative to the Lloyd pan lids.
I followed the instructions inside which were exactly what I always do to season new pans. I set my oven on high, rubbed a very thin layer of flaxseed oil all over the pan, let it bake for an hour, then repeated the process a few more times. My seasoned pan looked like this:
I also took this opportunity to document how the inside of the folded corner seems looked, as I was a little worried that this seam might make it difficult to release the pizza from the corners of the pan:
The next day, I had the opportunity to try the pan out in my Roccbox. I immediately recalled the most troubling of the amazon comments. Here is a photo of the pan in the super hot Roccbox:
Here we see the most dramatic warping of any pan used in any of my trials. I could spin the pan around like a top as it only directly contacted the Roccbox floor at a small point at the center! I should take this opportunity to point out that this pan is made of paltry 26 gauge steel. The Lloyd pan, which does not seem to warp at all, is made of a whopping 14 gauge aluminum. These are not even in the same ballpark.
Once the pizza was finished, I found that the pizza was surprisingly easy to release from the pan. There was just a very small amount of sticking on the underside, but I believe this would all resolve itself as the pan became better seasoned.
Here are the pizza results:
So far so good. The heat transfer looked good. The sides are nice and dark. Now let's look at the bottom of the pizza:
Ouch! There are two issues here: For some reason, the bottom of the dough formed some large bubbles. I can't say for certain that this is a problem with the pan. However, you can see just how much darker the center of the crust is as compared to the corners of the crust, which have not browned at all. The pan had produced a pizza that was drastically un-uniform in its texture because of the severe warping. I suspect that this pan would do a better job when using the lower temperature kitchen oven method. However, I just don't think that the pan is well designed.
At the end of the day, I simply cannot recommend this pan. Its low gauge and propensity to warp lead to a sub-par pizza. The Lloyd pan excels in every area from non-stick, to higher gauge, higher build quality, superior heat transfer, and finally that there is almost no upkeep such as seasoning. The Chicago Style Pizza Company seems to push the Lloyd pans themselves, even as they compete directly with their own in-house product. Perhaps if this product were a higher gauge, it would be a viable option.
This is probably my final pan experiment. I believe the following to be my final suggestions:- Use a cheap, non-stick 8"x8" cake pan. You can buy them between $3 - $6 USD. Some of your pizza ingredients will cost more than this! I achieve great results every week using a few of these. The only downside is a little bit of warping while cooking that leads to a slightly uneven crust on the bottom.
- The Lloyd pans are simply the best pans that you can buy for pan-style pizza, period. At 10x the cost of the cheap cake pans, they had better be. Once you've decided that Detroit-Style pizza will be a regular feature in your home food rotation, this pan will yield the best results that you can possibly get by offering a darker, more even crispy bottom crust. However, difference in the end-result between the Lloyd Pan pizza and the cheap cake pan pizza is not very big.
- If you are using a pizza oven where the heat comes from the bottom up (i.e. Camp Chef's Italia Artisan pizza oven or the a Big Green Egg jacked up to 750F+), You may find that you get the best results from using the Bayou Classic 10" square cast-iron pan. With most pizza setups, you are going out of your way to deliver extra heat to the bottom of the pan. In these cases, the bottom of the oven can be so much hotter than the top that you need to provide a buffer-zone under your pizza. The cast-iron pan provides it with great results.
Closing Thoughts:
I've finally almost caught up to the present. I am looking forward to finding some time to rewrite the original post and provide a definitive tutorial for those who want to reproduce my pizza. It is difficult to imagine anything else at this point having any major improvement on my product. In the meantime, I have 2 more small experiments to conduct:
1. I will try the addition of Diastatic Malt in my pizza dough recipe, as per Jon Liebers suggestion.
2. It has been suggested that a mixture of cubed, sliced, and shredded cheese on top of the pizza can enhance the composition by adding additional textures to the cheese.
If anyone else can suggest anything, I'm open to considering new angles.Last edited by coreyo; July 29, 2019, 09:02 AM.Comment
-
I don't remember, and I'm not gonna go back and read through this whole post to see right now, but using cheese I grate myself gives me better results than packaged grated cheese on the NY style pizzas I normally bake.
At some point, I'm gonna give your recipe a try. However, my wife doesn't eat pizza often because "it's not healthy", and when she does, she wants a very thin crust.Comment
-
The Lucerne Whole Milk "Rustic Cut" mozzarella cheese does okay. However, from what I can see, they have to mix the cheese with something like corn starch to keep it from sticking to itself. This is the same reason that kosher salt is preferable to table salt. I get the best results from shredding a 1lb sphere of whole milk mozzarella and mixing it with Provolone/Colby Jack and Garlic NY Style Cheddar from the deli. I ask them just to cut a big 1" block instead of slicing it.
-
I wonder if the results would be good cooking on a RecTec Bullseye pellet grill, which can easily sustain 500-600 degrees? Put in a pizza stone, or use upside-down grill grates maybe? Seems like it would work like an oven but perhaps add some wood fire to the mix.Comment
-
Thanks for taking us along on this journey. I am not sure I'll ever get around to trying this, but if I do, it is great to have this resource to fall back on.Comment


Comment